Pouffe Crochet Patterns
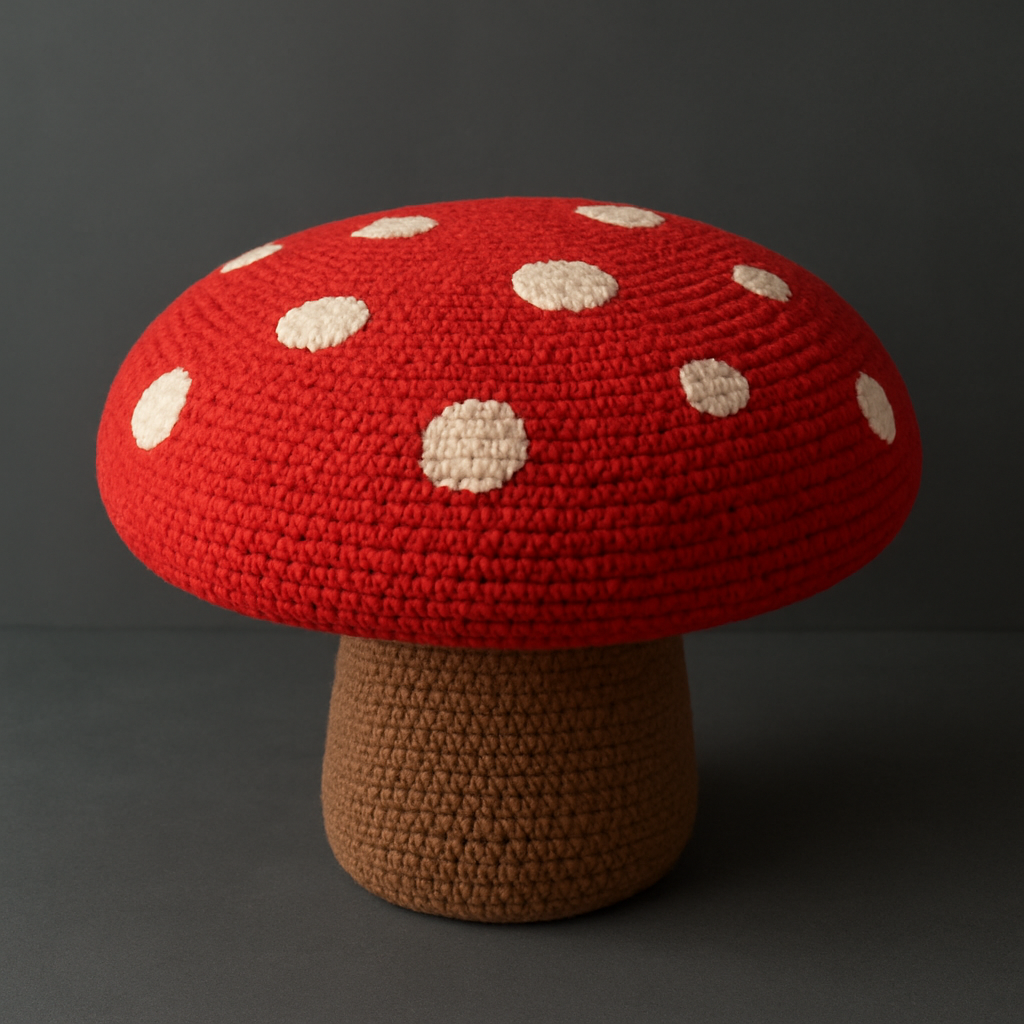
Enchanted Forest Mushroom Pouffe Free Pattern
Anonymous
•
July 07, 2026

Enchanted Forest Mushroom Pouffe Free Pattern
Introduction
Bring a touch of whimsy to your living space with this enchanting mushroom-shaped pouffe. Perfect for adding a playful yet sophisticated element to any room, this crochet pattern is designed for beginners and will guide you step-by-step to create your very own mushroom pouffe. Let’s get started on this delightful project that will surely become a conversation piece in your home!
Materials Needed
- Yarn: Bulky weight yarn in red, white, and brown
- Hook: Size L (8.0 mm) crochet hook
- Gauge: 8 single crochet (sc) and 9 rows = 4 inches
- Stuffing: Fiberfill or any stuffing material for the stem
- Yarn Needle: For weaving in ends and sewing pieces together
Step-by-Step Instructions
1. Create the Mushroom Cap
- With red yarn, make a magic ring.
- Round 1: Work 6 single crochet (sc) into the magic ring. (6 sts)
- Round 2: Increase in each stitch around (inc in each st). (12 sts)
- Round 3: *Single crochet in the next stitch, increase in the next stitch*; repeat around. (18 sts)
- Round 4: *Single crochet in the next 2 stitches, increase in the next stitch*; repeat around. (24 sts)
- Continue increasing in this manner until you have 72 stitches. (You will increase by one additional single crochet before each increase in each round.)
- Rounds 10-20: Single crochet in each stitch around. (72 sts)
- Change to white yarn.
- Round 21: *Single crochet in the next 10 stitches, decrease (dec)*; repeat around. (66 sts)
- Round 22: *Single crochet in the next 9 stitches, decrease*; repeat around. (60 sts)
- Continue decreasing in this manner until you have 18 stitches left.
- Fasten off and weave in the ends using a yarn needle.
2. Create the Mushroom Stem
- With brown yarn, make a magic ring.
- Round 1: Work 6 single crochet (sc) into the magic ring. (6 sts)
- Round 2: Increase in each stitch around. (12 sts)
- Round 3: *Single crochet in the next stitch, increase in the next stitch*; repeat around. (18 sts)
- Rounds 4-20: Single crochet in each stitch around. (18 sts)
- Stuff the stem firmly with fiberfill or your chosen stuffing material.
- Sew the stem to the bottom of the mushroom cap securely using a yarn needle.
3. Add the Finishing Touches
- Using white yarn, create small circles and sew them randomly onto the cap to represent the classic white spots of a toadstool.
- Ensure all ends are woven in and secure any loose threads.
Congratulations! You have now completed your very own Enchanted Forest Mushroom Pouffe. This charming piece will not only brighten up your space but also provide a cozy spot to rest your feet or a whimsical seat for guests. Enjoy your crafting!
Also Check Out: We think you'd love this beautiful pattern on our sister site: Adorable Crochet Octopus Amigurumi Pattern