Blooming Bouquet Amigurumi Free Pattern
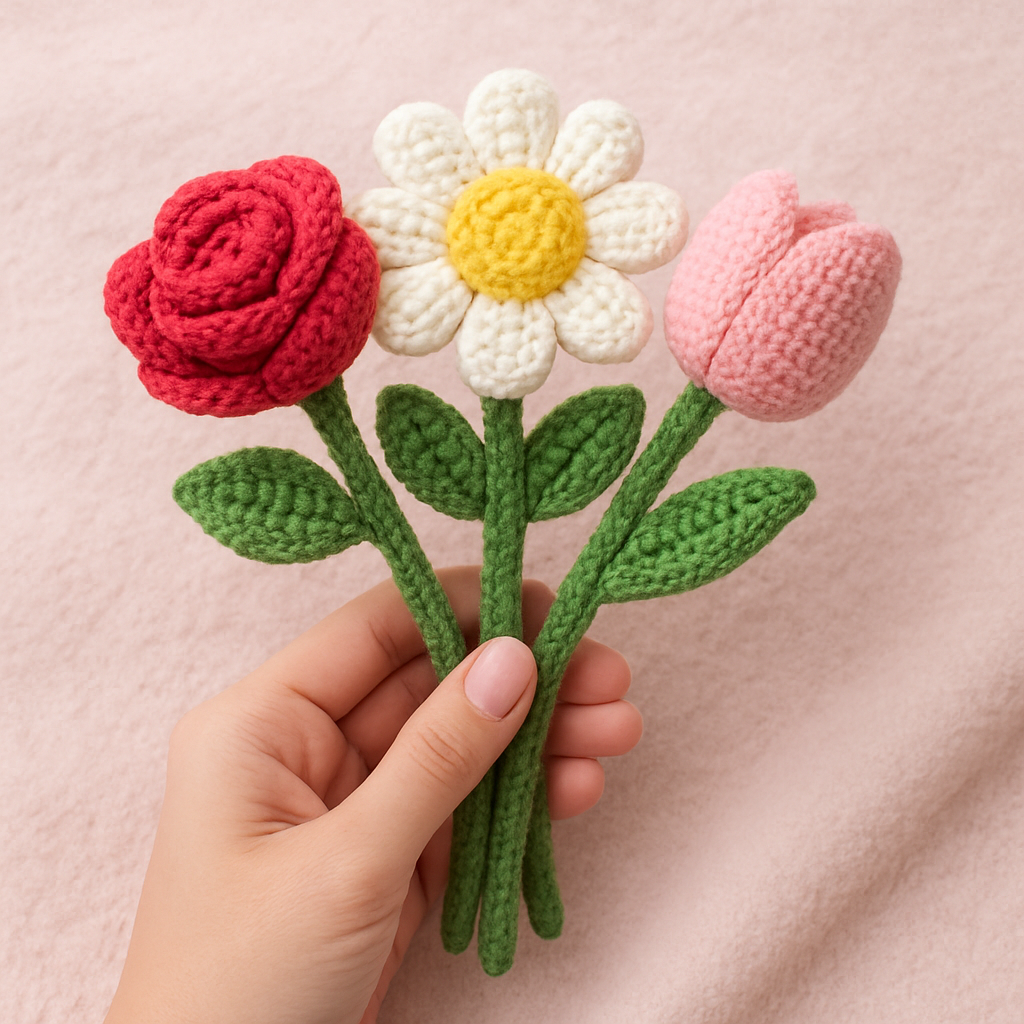
Blooming Bouquet Amigurumi Free Pattern
Introduction
Welcome to the world of amigurumi! In this blog post, we will guide you through creating a delightful amigurumi bouquet featuring a variety of textured flowers. This charming arrangement includes a rose, a daisy, and a tulip, each designed to brighten any space. With easy-to-follow instructions, even beginners can create this beautiful bouquet at home!
Materials Needed
- Yarn: Cotton DK weight yarn in assorted floral colors
- Hook: 3.5 mm crochet hook
- Other Supplies: Scissors, yarn needle for weaving in ends, and a stitch marker (optional)
Step-by-Step Instructions
Creating the Flowers
1. Rose
- Start with a magic ring.
- Round 1: Chain 1, then work 6 single crochets (sc) into the ring. Join with a slip stitch (sl st) to the first sc. (6 sts)
- Round 2: Chain 3, then work 2 double crochets (dc) in each sc around. Join with sl st to the first dc. (12 sts)
- Round 3: Chain 3, then (dc, chain 1, dc) in each dc around. Join with sl st. Fasten off and weave in ends.
2. Daisy
- Start with a magic ring.
- Round 1: Chain 1, then work 8 single crochets (sc) into the ring. Join with sl st to the first sc. (8 sts)
- Round 2: Chain 2, then work (half double crochet (hdc), chain 1, hdc) in each sc around. Join with sl st. (16 sts)
- Round 3: Chain 1, then work 1 sc in each hdc and chain-1 space around. Join with sl st. Fasten off and weave in ends.
3. Tulip
- Start with a magic ring.
- Round 1: Chain 1, then work 5 single crochets (sc) into the ring. Join with sl st to the first sc. (5 sts)
- Round 2: Chain 1, then work 2 sc in each sc around. (10 sts)
- Round 3: Chain 1, then work (sc, 2 sc in next sc) around. (15 sts)
- Round 4-5: Work 1 sc in each sc around. Fasten off and weave in ends.
Creating the Leaves
- Chain 10.
- In the 2nd chain from the hook, work 1 sc, then 1 hdc in the next chain, followed by 1 dc in the next 5 chains, 1 hdc in the next chain, and 1 sc in the last chain. Fasten off and weave in ends.
Creating the Stems
- Chain 20.
- In the 2nd chain from the hook, work a slip stitch (sl st) and continue to sl st in each chain across. Fasten off and weave in ends.
Assembling the Bouquet
To assemble your bouquet, sew the flowers to the stems securely. Arrange the flowers with the leaves to create a beautiful display. Feel free to adjust the positioning of the flowers to your liking!
Conclusion
Congratulations on creating your very own Blooming Bouquet Amigurumi! This delightful arrangement not only adds a touch of color to your space but also showcases your crafting skills. Enjoy your handmade creation and share it with friends and family!



