Argyle Diamond Crochet Headwrap Free Pattern
Argyle Diamond Crochet Headwrap: A Complete Beginner's Guide
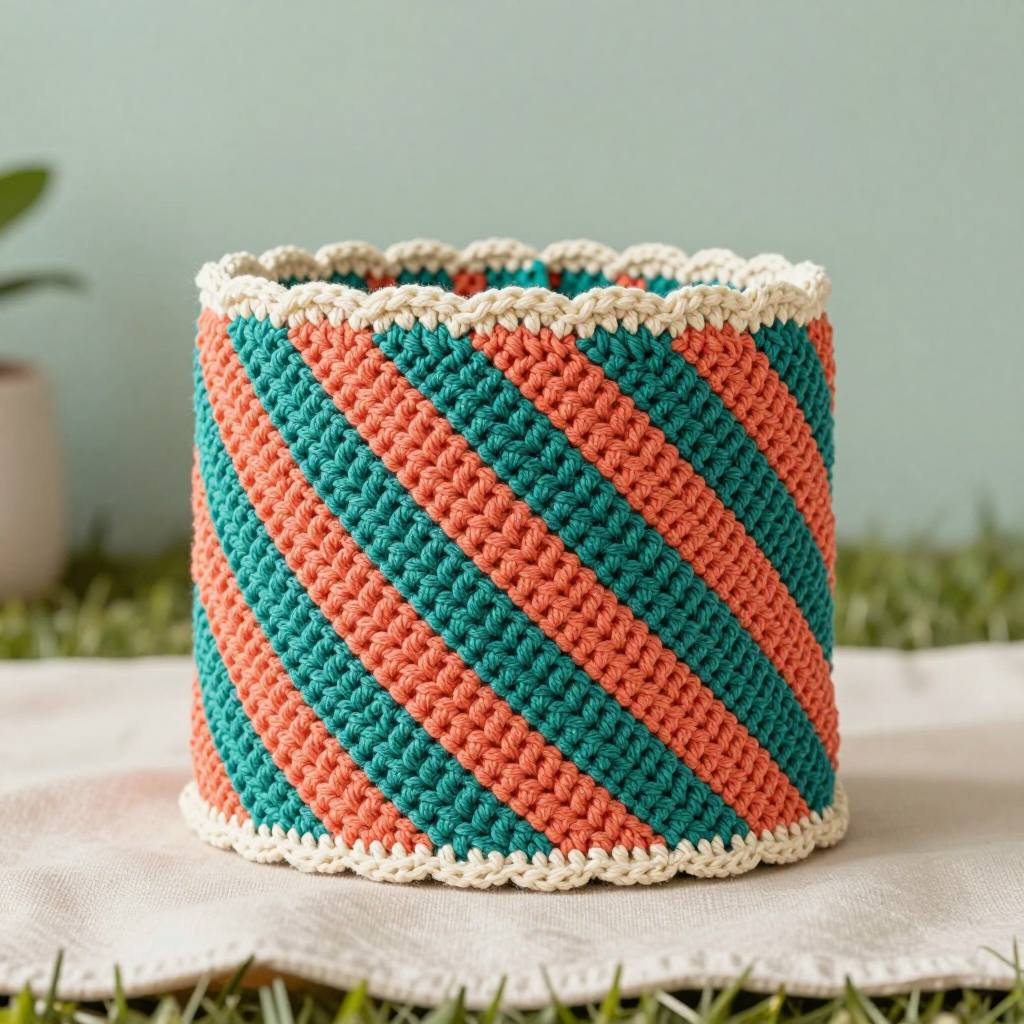
This preppy argyle headwrap is the perfect first colorwork project for anyone who has just learned the single crochet stitch. Worked flat as a simple rectangle, it uses crisp diagonal blocks of teal and coral to create a classic diamond motif, then finishes with a soft cream scallop edging along both long edges. The finished piece is a cozy, dense tube that hugs your head and keeps your ears warm on chilly walks, and the geometric design looks far more complicated than it actually is. If you can work single crochet back and forth in rows, you can absolutely make this headwrap. Let's take it one row at a time together.
Materials Needed
- Yarn: Worsted weight (Category 4) acrylic or wool-blend yarn, approximately 150 yards total: 90 yards teal (Color A), 40 yards coral (Color B), and 20 yards cream (Color C) for the scallop edging.
- Crochet hook: 5.0 mm (US size H/8).
- Stitch markers: At least 4, to mark color-change points and the seam.
- Tapestry needle: A blunt-tipped needle with a large eye for weaving in ends and seaming.
- Scissors: Sharp craft scissors for cutting yarn.
- Finished size: 20 inches (51 cm) circumference x 4.5 inches (11.5 cm) height before edging. The flat rectangle before seaming measures 20 inches wide x 4.5 inches tall. With the cream scallop edging, the total height is approximately 5.5 inches (14 cm).
Abbreviations and Beginner Glossary
- ch – chain: Yarn over (wrap yarn around hook), pull the loop through the loop on your hook. This creates a small "V" of chain.
- sc – single crochet: Insert hook into the stitch, yarn over, pull up a loop (2 loops on hook), yarn over again, pull through both loops. One single crochet made.
- dc – double crochet: Yarn over, insert hook into stitch, yarn over, pull up a loop (3 loops on hook), yarn over, pull through 2 loops, yarn over, pull through remaining 2 loops.
- sl st – slip stitch: Insert hook into stitch, yarn over, pull the loop straight through both the stitch and the loop on your hook. Creates a nearly invisible joining stitch.
- st(s) – stitch(es): A single completed stitch or several of them.
- sk – skip: Do not work into the next stitch; move past it to the following stitch.
- A – teal yarn.
- B – coral yarn.
- C – cream yarn.
- Right Side (RS) – the front, public face of your work.
- Turn – flip your work over so you can work back across the row you just finished.
- Change color – on the final yarn-over of the last stitch in the old color, drop the old color and pull the new color through to complete the stitch. This keeps the color edge clean.
- Intarsia – a colorwork method where each color block uses its own small bobbin or ball of yarn, and you twist the yarns where they meet so no long strands are carried across the back.
Gauge
16 single crochet stitches x 18 rows = 4 inches (10 cm) in single crochet.
Gauge matters because it tells you whether your finished headwrap will actually measure 20 inches around. If your stitches are too big, the headwrap will be loose and slouchy; if they are too tight, it may not fit over your head. To check your gauge, crochet a small practice square about 5 inches wide and 5 inches tall in single crochet. Lay it flat, place a ruler across the middle, and count how many stitches fit in 4 inches. If you have more than 16 stitches, your tension is tight—try going up one hook size. If you have fewer than 16, your tension is loose—try going down one hook size. Wash and dry your swatch the way you plan to care for the headwrap, since some yarns relax after washing.
Beginner Tips Before You Start
- Use stitch markers at every color change. Place a marker in the first stitch of each color block so you can quickly check that your block counts are correct as you work across the row.
- Do not pull the carried yarn too tight. When you switch colors, leave the unused yarn slightly loose along the back. If it is pulled tight, the fabric will pucker and the headwrap will not lie flat.
- Count your stitches at the end of every row. Every row in the main body should have exactly 80 stitches. Counting takes ten seconds and saves hours of ripping out.
- Keep your turning chain loose. The ch 1 at the start of each row is not a stitch—it simply lifts your yarn to the next row height. Do not work into it when you come back across.
- Work with separate bobbins for each color block. Wind a small ball or bobbin for each teal and coral section rather than dragging one big skein back and forth. This keeps your tension even and your ends tidy.
- Practice the color change on a swatch first. Work a few rows of your gauge swatch with a color change in the middle so your hands learn the motion before you begin the real project.
Step-by-Step Instructions
Setup and Base Rows
Row 1 (Right Side): With A (teal), ch 81. Sc in the 2nd ch from hook and in each ch across. (80 sc)
Row 2: Ch 1, turn. Sc in each st across in A. (80 sc)
Diamond Color Block Section (Rows 3–20)
The argyle motif is created by working diagonal blocks of A and B. Each diamond spans 20 stitches wide and 18 rows tall, and there are four full diamonds across the 80-stitch width. Change color on the last yarn-over of the previous stitch, and carry the unused color loosely along the wrong side.
Row 3: Ch 1, turn. With A, sc in first 10 sts. Change to B, sc in next 20 sts. Change to A, sc in next 20 sts. Change to B, sc in next 20 sts. Change to A, sc in last 10 sts. (80 sc)
Row 4: Ch 1, turn. With A, sc in first 8 sts. Change to B, sc in next 24 sts. Change to A, sc in next 16 sts. Change to B, sc in next 24 sts. Change to A, sc in last 8 sts. (80 sc)
Row 5: Ch 1, turn. With A, sc in first 6 sts. Change to B, sc in next 28 sts. Change to A, sc in next 12 sts. Change to B, sc in next 28 sts. Change to A, sc in last 6 sts. (80 sc)
Row 6: Ch 1, turn. With A, sc in first 4 sts. Change to B, sc in next 32 sts. Change to A, sc in next 8 sts. Change to B, sc in next 32 sts. Change to A, sc in last 4 sts. (80 sc)
Row 7: Ch 1, turn. With A, sc in first 2 sts. Change to B, sc in next 36 sts. Change to A, sc in next 4 sts. Change to B, sc in next 36 sts. Change to A, sc in last 2 sts. (80 sc)
Row 8: Ch 1, turn. With B, sc in first 40 sts. Change to B, sc in last 40 sts (the B sections meet at the center point; work all 80 sts in B). (80 sc)
Row 9: Ch 1, turn. With B, sc in first 2 sts. Change to A, sc in next 36 sts. Change to B, sc in next 4 sts. Change to A, sc in next 36 sts. Change to B, sc in last 2 sts. (80 sc)
Row 10: Ch 1, turn. With B, sc in first 4 sts. Change to A, sc in next 32 sts. Change to B, sc in next 8 sts. Change to A, sc in next 32 sts. Change to B, sc in last 4 sts. (80 sc)
Row 11: Ch 1, turn. With B, sc in first 6 sts. Change to A, sc in next 28 sts. Change to B, sc in next 12 sts. Change to A, sc in next 28 sts. Change to B, sc in last 6 sts. (80 sc)
Row 12: Ch 1, turn. With B, sc in first 8 sts. Change to A, sc in next 24 sts. Change to B, sc in next 16 sts. Change to A, sc in next 24 sts. Change to B, sc in last 8 sts. (80 sc)
Row 13: Ch 1, turn. With B, sc in first 10 sts. Change to A, sc in next 20 sts. Change to B, sc in next 20 sts. Change to A, sc in next 20 sts. Change to B, sc in last 10 sts. (80 sc)
Row 14: Ch 1, turn. With A, sc in first 10 sts. Change to B, sc in next 20 sts. Change to A, sc in next 20 sts. Change to B, sc in next 20 sts. Change to A, sc in last 10 sts. (80 sc)
Row 15: Ch 1, turn. With A, sc in first 8 sts. Change to B, sc in next 24 sts. Change to A, sc in next 16 sts. Change to B, sc in next 24 sts. Change to A, sc in last 8 sts. (80 sc)
Row 16: Ch 1, turn. With A, sc in first 6 sts. Change to B, sc in next 28 sts. Change to A, sc in next 12 sts. Change to B, sc in next 28 sts. Change to A, sc in last 6 sts. (80 sc)
Row 17: Ch 1, turn. With A, sc in first 4 sts. Change to B, sc in next 32 sts. Change to A, sc in next 8 sts. Change to B, sc in next 32 sts. Change to A, sc in last 4 sts. (80 sc)
Row 18: Ch 1, turn. With A, sc in first 2 sts. Change to B, sc in next 36 sts. Change to A, sc in next 4 sts. Change to B, sc in next 36 sts. Change to A, sc in last 2 sts. (80 sc)
Row 19: Ch 1, turn. With B, sc in first 40 sts. Change to B, sc in last 40 sts (the B sections meet at the center point; work all 80 sts in B). (80 sc)
Row 20: Ch 1, turn. With B, sc in first 2 sts. Change to A, sc in next 36 sts. Change to B, sc in next 4 sts. Change to A, sc in next 36 sts. Change to B, sc in last 2 sts. (80 sc)
Top Border Rows (Rows 21–22)
Row 21: Ch 1, turn. With A, sc in each st across. (80 sc)
Row 22: Ch 1, turn. With A, sc in each st across. (80 sc)
Fasten off A. Do not turn.
Scallop Edging
Work the edging along both long edges with C (cream).
Top Edge, Row 1: With C, join yarn at the right corner of the top long edge. Ch 1, sc evenly across the top edge. (80 sc) Turn.
Top Edge, Row 2: Ch 1, *sk 2 sts, 5 dc in next st, sk 2 sts, sl st in next st; repeat from * across. Fasten off C.
Bottom Edge, Row 1: With C, join yarn at the right corner of the bottom long edge (the foundation chain edge). Ch 1, sc evenly across the bottom edge. (80 sc) Turn.
Bottom Edge, Row 2: Ch 1, *sk 2 sts, 5 dc in next st, sk 2 sts, sl st in next st; repeat from * across. Fasten off C.
Assembly and Finishing
1. Weave in ends. Thread each yarn tail onto your tapestry needle and weave it back and forth through the wrong side of the fabric for about 2 inches, changing direction once so it cannot work loose. Pay special attention to the color-change points, where several short tails will gather.
2. Block the rectangle. Pin the piece right side up to a towel or blocking mat, stretching it gently to measure 20 inches wide x 4.5 inches tall. Mist it lightly with water and let it dry completely. This relaxes the stitches and makes the diamonds crisp and even.
3. Seam the short ends. Fold the rectangle in half with right sides together, matching the two short ends. Thread A (teal) on your tapestry needle and whipstitch the short ends together: bring the needle through the first stitch of both edges, then the next, and so on, keeping your stitches even and snug. Alternatively, use your 5.0 mm hook and slip stitch the edges together. Fasten off and weave in the end.
4. Turn right side out. Gently push the tube right side out. The cream scallop edging should now sit at the top and bottom of the finished headwrap, framing the argyle diamonds.
Pro Tips and Variations
- Change the colors: Swap teal and coral for navy and mustard, or forest green and rust, for a different seasonal look. Keep one color light and one dark so the diamonds stay crisp.
- Make it wider: For a taller headwrap, add 20 stitches (one full diamond repeat) to the foundation chain and adjust the color block counts accordingly. Each added diamond adds about 5 inches of height.
- Try a different yarn: A soft merino wool blend gives extra warmth, while a cotton blend gives a crisper, more structured fabric. Always check your gauge again if you change yarn.
- Add a fleece lining: For extra warmth on cold days, cut a 20-inch x 4.5-inch strip of soft fleece and hand-sew it inside the tube along the seam edge.