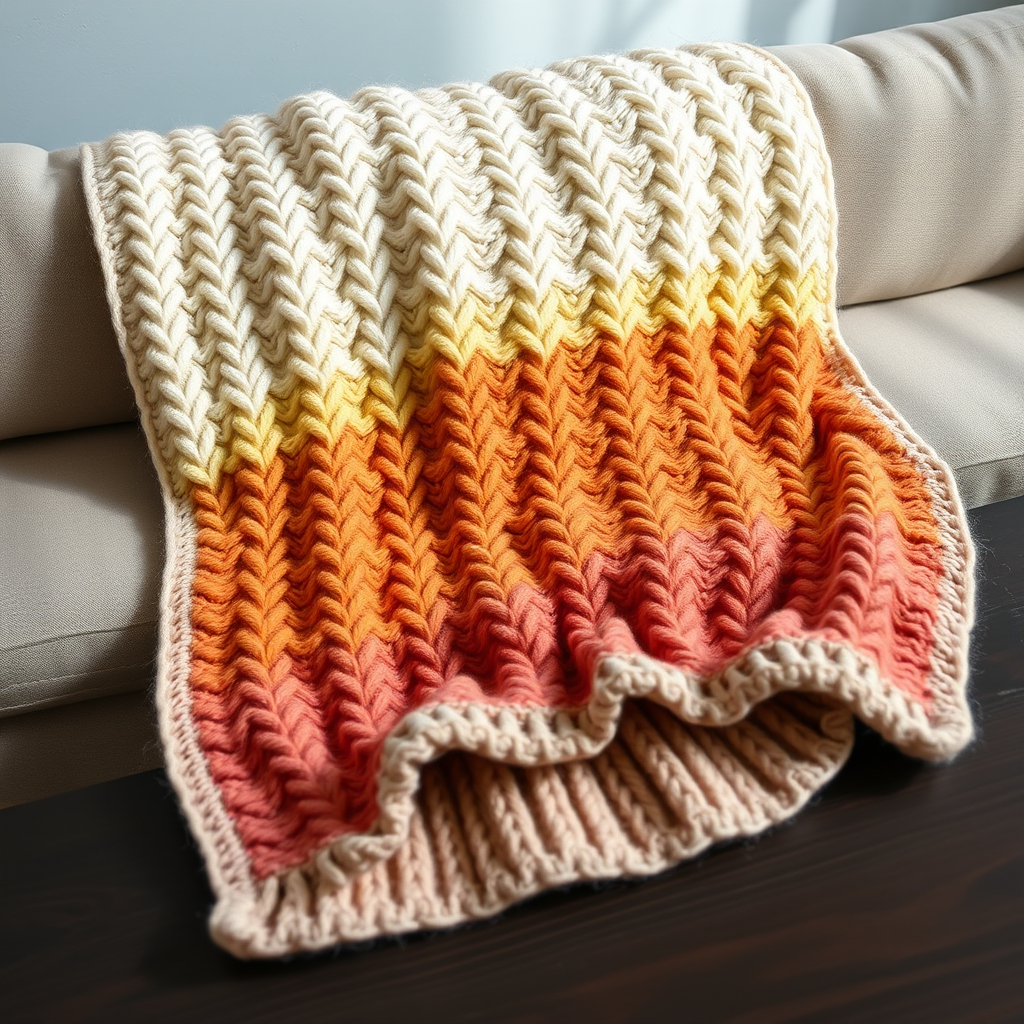
Rustic Arch Column Stitch Wall Hanging Free Pattern – Knit a Textured Tapestry

Bring Ancient Charm Home: The Rustic Arch Column Stitch Wall Hanging
Imagine transforming a blank wall into a warm, textured focal point that whispers of ancient architecture and cozy bohemian vibes. That's exactly what you'll achieve with this stunning knitted wall hanging, featuring the intricate Arch Column Stitch. Using a palette of earthy terracotta, cream, and olive green, this tapestry is more than just decor—it's a statement piece that adds depth, dimension, and a handcrafted soul to any modern rustic space. Whether you're a seasoned knitter or a confident beginner ready for a rewarding project, this free pattern will guide you through creating a beautiful 12" x 24" textured masterpiece.
This project is perfect for those who love texture and color play. The Arch Column Stitch creates repeating vertical columns of cables and ribs, giving the piece a chunky, cozy, and dimensional feel. The subtle gradient color shift from bottom to top adds a modern twist to a classic technique. Let's gather our materials and get started on this rewarding knitting journey.
Materials Needed: Your Knitting Toolkit
Before you begin, ensure you have all the necessary supplies. This project is portable and requires minimal equipment, making it perfect for cozy evenings in.
- Yarn: Worsted weight cotton or wool blend in three colors:
- Color A: Terracotta (approx. 100g)
- Color B: Cream (approx. 100g)
- Color C: Olive Green (approx. 50g)
- Needles: US 7 (4.5mm) knitting needles
- Notions: Tapestry needle for weaving in ends, cable needle (or a spare double-pointed needle), stitch markers (optional but helpful)
- Hardware: A wooden dowel or branch (approx. 14 inches long) for hanging
Gauge: 20 stitches and 28 rows = 4 inches in stockinette stitch. Always check your gauge to ensure your finished piece matches the intended dimensions.
Step-by-Step Instructions: Knitting Your Tapestry
This wall hanging is knitted flat in one piece from the bottom up. We'll use a combination of knit, purl, and cable stitches to create the Arch Column pattern. The finished piece measures approximately 12 inches wide and 24 inches long, excluding fringe. Let's break it down into manageable steps.
Understanding Your Abbreviations
Familiarize yourself with these standard knitting abbreviations before you start:
- K = Knit
- P = Purl
- C4F = Slip 2 stitches to cable needle, hold in front, knit 2, knit 2 from cable needle
- C4B = Slip 2 stitches to cable needle, hold in back, knit 2, knit 2 from cable needle
- K2tog = Knit 2 stitches together (Note: This is not used in the main pattern but is good to know for finishing)
- Yo = Yarn over (Not used here, but listed for completeness)
Part 1: The Foundation and Base
We'll start with a sturdy base to support the weight of the tapestry.
Foundation Row (Right Side): With Color A (Terracotta), cast on 60 stitches using your preferred method.
Rows 1-4: Work in garter stitch (knit every stitch across every row). This creates a firm, non-curling base for your hanging.
Part 2: Establishing the Arch Column Pattern
Now we'll begin the main pattern. The stitch repeat is designed to create two mirrored arch columns across your 60 stitches.
Row 5 (RS): Switch to Color B (Cream). Knit 6 stitches, *P2, K6, P2, K10, P2, K6, P2, K6*, repeat from * to * once more, end with K6. (Total 60 stitches). Tip: Place a stitch marker after the first 6 stitches and before the last 6 stitches to help you keep track of the border.
Row 6 (WS): Purl 6, *K2, P6, K2, P10, K2, P6, K2, P6*, repeat from * to * once more, end with P6. This row sets the reverse stockinette background for the cables.
Part 3: Creating the Cables
This is where the magic happens! The cables will form the "columns" of your arch.
Row 7 (RS): Knit 6, *P2, C4F, K2, P2, K10, P2, C4B, K2, P2, K6*, repeat from * to * once more, end with K6. Note: The C4F and C4B create the twists in your columns.
Row 8 (WS): Repeat Row 6.
Rows 9-12: Repeat Rows 5 and 6 twice more. This maintains the column pattern and allows the cable twists to "rest" between crossings.
Row 13 (RS): Knit 6, *P2, K6, P2, K10, P2, K6, P2, K6*, repeat from * to * once more, end with K6. This completes the first full Arch Column repeat (Rows 5-13).
Part 4: The Color-Blocking Magic
Now we'll introduce the other colors to create the beautiful gradient effect. We'll be working in sections of 13 rows, changing colors at specific points.
Rows 14-26: Repeat Rows 5-13, but on Row 19 (which is a RS row), switch to Color C (Olive Green) for the center column section. To do this, when you reach the K10 section in the middle of each repeat, knit those 10 stitches with Color C. Carry the other yarns loosely along the back of the work, being careful not to pull them too tight.
Rows 27-39: Repeat Rows 5-13, but on Row 32, switch the center column (the K10 section) back to Color B (Cream), and the outer columns (the K6 sections) to Color C (Olive Green). This creates a beautiful color-blocked arch effect.
Rows 40-52: Repeat Rows 5-13, but on Row 45, switch the center column to Color A (Terracotta), and the outer columns to Color B (Cream).
Continue the Pattern: Keep repeating Rows 5-13, following this color progression logic. Continue shifting the colors in the columns every 13 rows until the piece measures approximately 22 inches from the cast-on edge. You can create your own color sequence or follow this suggested progression. The key is to have fun and make it your own!
Part 5: Finishing Touches
Your hard work is about to pay off. Let's finish the piece so it's ready to hang.
Bind Off: Bind off loosely in pattern on the last row. To keep the edge from being too tight, use a larger needle to bind off or bind off in pattern (knit the knits and purl the purls).
Weave in Ends: Thread your tapestry needle with the yarn tails and weave them in securely along the edges or through the back of the work. This is crucial for a professional finish.
Blocking: Gently block the piece. You can do this by pinning it to a blocking mat and lightly steaming it (without touching the iron to the yarn) or misting it with water and letting it dry flat. This will even out the stitches and enhance the cable texture.
Attach the Dowel: Fold the top edge over the wooden dowel. Sew the folded edge in place using a whip stitch or mattress stitch, leaving a small opening to insert the dowel if you haven't already. Ensure the dowel is securely enclosed.
Add the Fringe: Cut 12-inch lengths of yarn in all three colors. For each fringe, fold a length in half, insert a crochet hook or your fingers through the bottom edge stitch, pull the loop through, and pass the yarn ends through the loop. Pull tight. Repeat across the bottom edge. Once all fringe is attached, trim the ends evenly to about 6 inches.
Hang and Enjoy: Place a nail or hook in your wall and hang your beautiful new tapestry. Step back and admire your handiwork!
Congratulations! You've created a stunning, textured piece of art that brings warmth and character to your home. This Rustic Arch Column Stitch Wall Hanging is a testament to the beauty of handcrafted decor. Happy knitting!