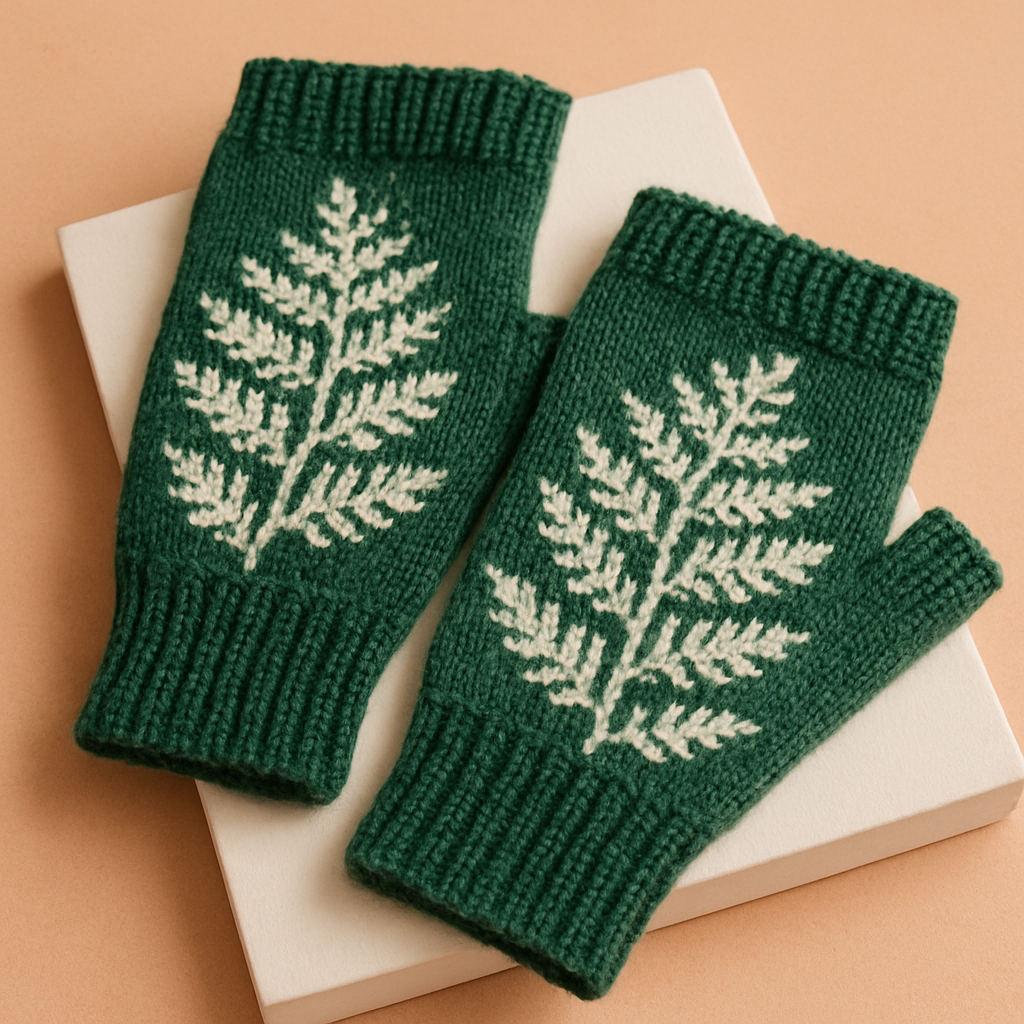
Frosted Fern Fingerless Gloves Free Pattern

Frosted Fern Fingerless Gloves Free Pattern
Introduction
Embrace the chill with these Frosted Fern Fingerless Gloves, featuring an intricate fern motif that dances across your hands. These gloves are perfect for adding a touch of nature-inspired elegance to your winter wardrobe. Not only will they keep your hands warm, but they also allow for full dexterity, making them ideal for texting or sipping hot cocoa on a brisk day.
Materials Needed
- Yarn: DK weight, 100% wool (rich forest green recommended)
- Needles: US 6 (4.0mm) double-pointed needles
- Gauge: 22 stitches and 30 rows = 4 inches in stockinette stitch
- Stitch markers (optional, for tracking rounds)
- Tapestry needle (for weaving in ends)
Step-by-Step Instructions
1. Cast On
Begin by casting on 48 stitches. Distribute the stitches evenly across three double-pointed needles (16 stitches on each needle). Make sure to join in the round carefully, ensuring that the stitches are not twisted.
2. Ribbing
Work in k2, p2 ribbing for 2 inches. This will create a snug cuff for your gloves. To do this, knit 2 stitches, then purl 2 stitches, and repeat this pattern until you reach the desired length.
3. Begin Fern Motif
Now it's time to add the beautiful fern motif. Follow the chart provided (if available) for 24 rounds, repeating the 12-stitch pattern twice around. This intricate design will add a lovely texture to the back of your gloves.
4. Stockinette Stitch
After completing the fern motif, switch to stockinette stitch (knit every round) until the piece measures 5 inches from the cast-on edge. This will form the palm of your glove.
5. Create Thumb Opening
On the next round, knit 24 stitches, then bind off 8 stitches. Knit to the end of the round. This creates the opening for your thumb.
6. Re-establish Round
On the following round, knit 24 stitches again, then cast on 8 stitches using the backward loop method. Knit to the end of the round. This will close the gap and create a thumb opening.
7. Continue in Stockinette Stitch
Continue working in stockinette stitch for an additional 1 inch. This will give your thumb area some length.
8. Final Ribbing
After reaching the desired length for the thumb, switch back to k2, p2 ribbing for 1 inch. This will match the cuff of the glove.
9. Bind Off
Once you have completed the ribbing, bind off all stitches loosely to ensure the cuff remains stretchy.
10. Finishing Touches
Weave in any loose ends with a tapestry needle. Make sure to secure all ends neatly to avoid any unraveling.
Conclusion
Congratulations! You have now completed your very own Frosted Fern Fingerless Gloves. Slip them on and enjoy the warmth and style they bring to your winter wardrobe. Happy knitting!