Willowmere V-Neck Cardigan Free Pattern – Knit a Cozy Child's Sweater
Willowmere V-Neck Cardigan Free Pattern – Knit a Cozy Child's Sweater
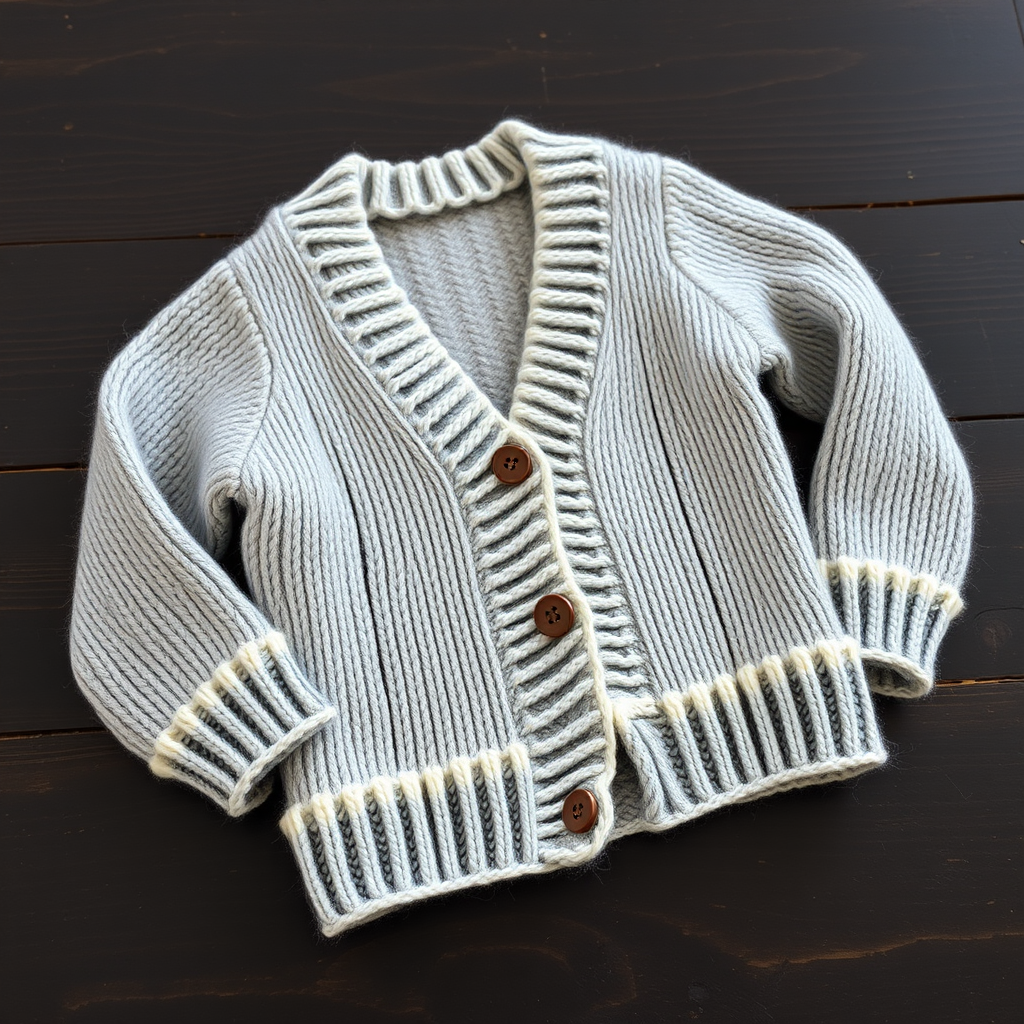
Wrap your little one in the gentle warmth of the Willowmere, a classic V-neck cardigan with a modern twist of textured ribbing and a soft, heathered palette. This knit pattern is designed for growing kids, offering both comfort and style for everyday adventures. The Willowmere features a smooth stockinette body with a subtle cable-like twist on the ribbed cuffs, hem, and front bands, creating a handcrafted heirloom piece. Whether it's for a crisp autumn walk or a cozy afternoon indoors, this cardigan is sure to become a favorite in your child's wardrobe.
Materials Needed
Before you begin, gather the following materials to ensure a smooth knitting experience:
- Yarn: Worsted weight yarn (e.g., Lion Brand Wool-Ease) in heather gray (MC) and cream (CC), approximately 600-800 yards depending on size. The main body uses the heather gray, while the V-neck band and button bands are worked in cream for a beautiful contrast.
- Needles: US 7 (4.5 mm) knitting needles, plus a spare needle or stitch holder for holding stitches.
- Notions: Stitch markers, tapestry needle for weaving in ends and seaming, and buttons (typically 5-7, depending on size).
Gauge: 20 stitches and 26 rows = 4 inches in stockinette stitch. Always check your gauge before starting to ensure the correct finished measurements.
Sizes and Abbreviations
Sizes: 4 (6, 8, 10) years. Finished chest: 24 (26, 28, 30) inches. Length: 14 (15, 16, 17) inches.
Abbreviations:
- CO = cast on
- K = knit
- P = purl
- K2tog = knit two together (right-leaning decrease)
- SSK = slip slip knit (left-leaning decrease)
- PM = place marker
- SM = slip marker
- RS = right side
- WS = wrong side
- St st = stockinette stitch (K on RS, P on WS)
Pattern Notes
The cardigan is worked flat in pieces from the bottom up, then seamed. The V-neck shaping is created with decreases at the center front. The textured ribbing uses a simple 2x2 rib with a twist: every 4th row, you work a cable-like twist on the rib columns for extra coziness. This twisted rib pattern is used on the hem, cuffs, and front bands, giving the Willowmere its signature look.
Step-by-Step Instructions
Back
Hem: CO 60 (66, 72, 78) sts with MC. Work in twisted rib pattern as follows:
- Row 1 (RS): *K2, P2; repeat from * to end.
- Row 2: *K2, P2; repeat from * to end.
- Row 3: *K2tog but do not drop sts, K the first st again, then drop both sts (this creates a twist), P2; repeat from * to end.
- Row 4: *K2, P2; repeat from * to end.
Repeat these 4 rows for 2 inches. Then switch to St st (K on RS, P on WS) and work straight until piece measures 9 (10, 11, 12) inches from CO edge, ending with a WS row.
Armhole shaping: Bind off 3 (4, 4, 5) sts at beginning of next 2 rows. Then decrease 1 st each side every RS row 2 (2, 3, 3) times as follows: K1, SSK, work to last 3 sts, K2tog, K1. Continue in St st until armhole measures 5 (5, 6, 6) inches. Place remaining 46 (50, 54, 58) sts on a holder for shoulders.
Left Front
Hem: CO 30 (33, 36, 39) sts with MC. Work twisted rib for 2 inches as for back. Switch to St st. Work straight until piece measures same as back to armhole, ending with WS row.
Armhole shaping: Bind off 3 (4, 4, 5) sts at beginning of next RS row. Decrease 1 st at armhole edge every RS row 2 (2, 3, 3) times as for back.
V-Neck shaping: AT THE SAME TIME, when piece measures 1 inch less than desired total length (i.e., after armhole shaping is complete), begin V-neck shaping: On RS rows, work to last 3 sts, K2tog, K1. Repeat this decrease every RS row until 16 (17, 18, 19) sts remain. Work even until armhole measures same as back. Bind off all sts.
Right Front
Work as for left front, but mirror shaping: At armhole, bind off at beginning of WS row. For V-neck, on RS rows: K1, SSK, work to end. Bind off.
Sleeves (Make 2)
Cuff: CO 34 (36, 38, 40) sts with MC. Work twisted rib for 2 inches. Switch to St st.
Increase section: Increase 1 st each side every 6th row until you have 46 (50, 54, 58) sts. To increase, work as follows: K1, M1 (make one), work to last st, M1, K1. Work even until sleeve measures 10 (11, 12, 13) inches from CO, ending with WS row.
Cap shaping: Bind off 3 (4, 4, 5) sts at beginning of next 2 rows. Decrease 1 st each side every RS row 8 (9, 10, 11) times. Then bind off 2 sts at beginning of next 4 rows. Bind off remaining sts.
Finishing
Seaming: Sew shoulder seams. Set in sleeves, sew side and sleeve seams. Use a mattress stitch for invisible seams on the stockinette sections.
V-Neck Band
With RS facing, using CC, pick up and knit sts around entire V-neck and front edges: pick up 1 st for every st/row along front edges, and 3 sts for every 4 rows along V-neck. Work in twisted rib for 1 inch, then bind off in pattern. Sew band ends together at center back neck.
Button Band (Left Front for girls, Right Front for boys)
With RS facing, using CC, pick up sts along straight front edge (not the V-neck band). Work twisted rib for 1 inch, binding off. Mark button positions evenly.
Buttonhole Band
Work as for button band, but on the 3rd row, create buttonholes: work 2 sts, *yo, K2tog, work 6 sts; repeat from * to end. Finish band.
Final Touches
Weave in all ends with a tapestry needle. Block gently to measurements, paying special attention to the twisted rib sections to ensure they lie flat. Sew buttons opposite the buttonholes. Your Willowmere V-Neck Cardigan is now ready to be worn and loved!
This pattern is perfect for knitters looking to create a timeless, handmade gift. The combination of the soft heather gray and cream, along with the subtle twisted rib detail, makes this cardigan a standout piece. Enjoy the process and the joy it will bring to the little one who wears it!


