Whispering Willow Pom Pom Cardigan Free Pattern – A Cozy Knit Layer with Fluffy Accents
Whispering Willow Pom Pom Cardigan Free Pattern – A Cozy Knit Layer with Fluffy Accents
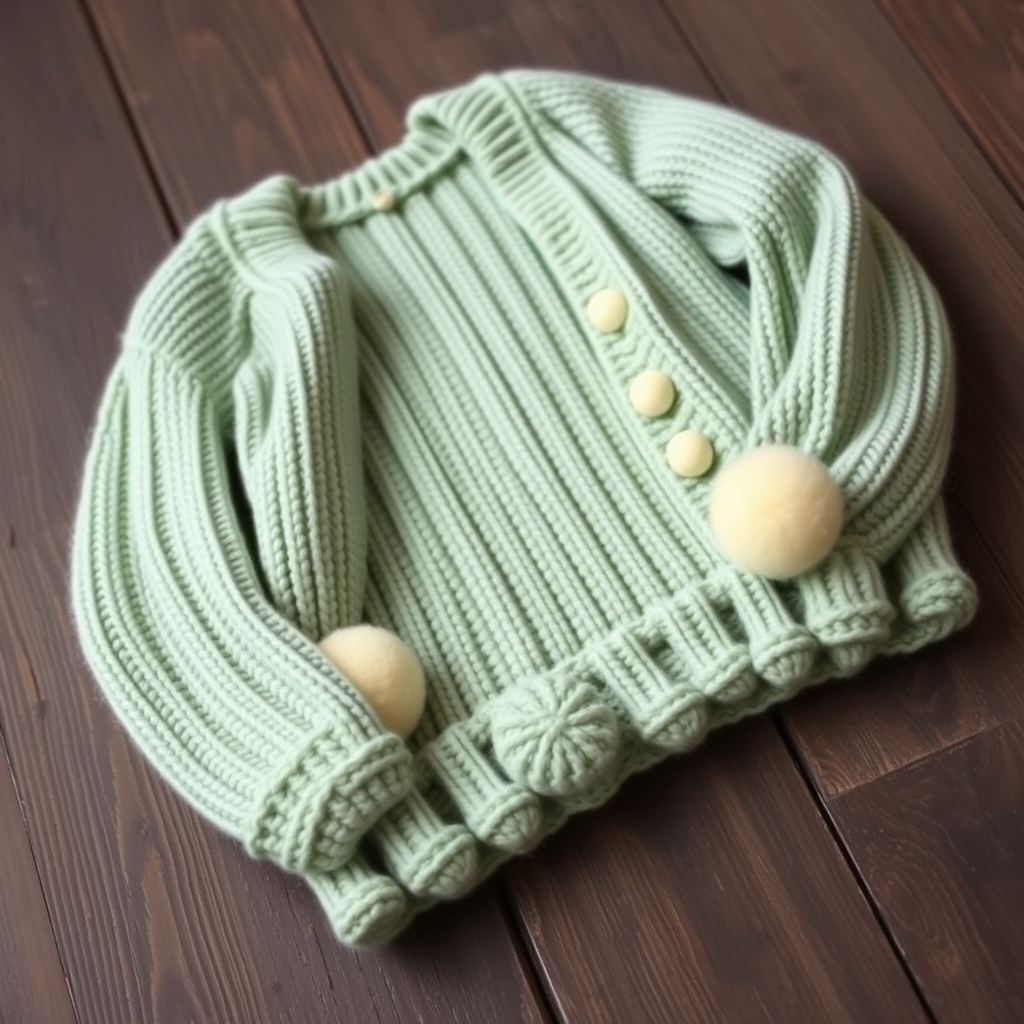
Wrap yourself in the gentle embrace of the Whispering Willow Cardigan, a modern knit with a softly textured body and playful pom pom trim. This pattern blends classic comfort with a fresh, whimsical touch, perfect for breezy evenings and cozy mornings. Whether you're curling up with a good book or stepping out for a crisp autumn walk, this cardigan is designed to become your new favorite layering piece. The relaxed, open-front silhouette means no buttons to fuss with—just pure, drapey comfort with a delightful fluffy accent that adds personality to every stitch.
This free knitting pattern is perfect for intermediate knitters looking to expand their skills, but with clear instructions and helpful tips, even confident beginners can tackle this rewarding project. The combination of a smooth stockinette body with a textured seed stitch hem and cuffs creates visual interest, while the cream pom pom trim adds that "wow" factor that makes this cardigan truly special.
Materials Needed
Before you begin your Whispering Willow journey, gather these essential supplies:
Yarn
- Main Color (MC): Worsted weight yarn in sage green – approximately 1200 (1350, 1500) yards for sizes XS (S/M, L/XL)
- Contrast Color (CC): Worsted weight yarn in cream for pom poms – approximately 100 yards
Pro tip: Choose a soft, squishy wool or wool-blend yarn for the best drape and cozy feel. The sage green evokes a calming, nature-inspired aesthetic that pairs beautifully with the cream accents.
Needles & Notions
- US 8 (5 mm) circular knitting needles with a 32-inch cable (for the body and yoke)
- US 8 (5 mm) double-pointed needles (for sleeves and pom pom attachment)
- Stitch markers (at least 6)
- Tapestry needle for weaving in ends and attaching pom poms
- Pom pom maker (2-inch diameter) or cardboard circles
- Scissors
- Measuring tape
Gauge
18 stitches and 24 rows = 4 inches in stockinette stitch, after blocking. Always knit a gauge swatch before starting—this ensures your finished cardigan will match the intended measurements. If your gauge is off, adjust your needle size accordingly.
Step-by-Step Instructions
Sizes & Measurements
This pattern is written for sizes XS (S, M, L, XL) with a finished bust measurement of 34 (38, 42, 46, 50) inches. Choose the size that gives you 2-4 inches of positive ease for that relaxed, cozy fit.
Abbreviations
- CO = cast on
- K = knit
- P = purl
- K2tog = knit two together (right-leaning decrease)
- SSK = slip slip knit (left-leaning decrease)
- PM = place marker
- SM = slip marker
- BO = bind off
- St(s) = stitch(es)
- RS = right side
- WS = wrong side
- M1L = make one left (increase)
- M1R = make one right (increase)
Special Stitches
Seed Stitch (multiple of 2):
Row 1 (RS): *K1, P1* repeat to end of row.
Row 2: *P1, K1* repeat to end of row.
Repeat these 2 rows for pattern. This creates a bumpy, textured fabric that adds wonderful visual interest to the hem and cuffs.
Pom Pom: Make using a pom pom maker or cardboard circles, aiming for 2 inches in diameter. For best results, wrap the yarn generously around the maker for a full, fluffy pom pom.
Body (Worked in One Piece to Armholes)
Step 1: CO 162 (180, 198, 216, 234) sts with MC. Place a marker at the beginning of the round and another after 81 (90, 99, 108, 117) sts to mark the sides. Join in the round, being extremely careful not to twist your stitches.
Step 2: Work in seed stitch for 2 inches for the bottom hem. This textured band will give your cardigan a beautiful, finished look and help it maintain its shape.
Step 3: Switch to stockinette stitch (knit every round) and work even until the piece measures 12 (12, 13, 13, 14) inches from the cast-on edge. The fabric will now have that smooth, classic knit appearance with distinct V-shaped stitches.
Divide for Armholes
Step 4: Next round: K to 4 (5, 5, 6, 6) sts before the first side marker, BO 8 (10, 10, 12, 12) sts for the underarm, K to 4 (5, 5, 6, 6) sts before the second side marker, BO 8 (10, 10, 12, 12) sts for the second underarm, K to end of round.
Step 5: You now have 73 (80, 89, 96, 105) sts for the front and the same number for the back. Place all stitches on hold using stitch holders or waste yarn while you work the sleeves.
Sleeves (Make 2)
Step 6: CO 36 (40, 44, 48, 52) sts with MC. Join in the round, placing a marker at the beginning. Work in seed stitch for 2 inches to create the cuff.
Step 7: Switch to stockinette stitch. Work an increase round as follows: K1, M1L, K to the last stitch, M1R, K1. This adds 2 stitches to your round.
Step 8: Repeat this increase round every 6 (6, 7, 7, 8) rounds until you have 56 (62, 68, 74, 80) sts on your needles. The increases will create a gentle taper that shapes the sleeve beautifully.
Step 9: Work even in stockinette until the sleeve measures 16 (17, 18, 19, 20) inches from the cast-on edge.
Step 10: BO 4 (5, 5, 6, 6) sts at the beginning of the next 2 rounds. Place the remaining 48 (52, 58, 62, 68) sts on hold. Repeat for the second sleeve.
Yoke
Step 11: With the RS facing, using your circular needle, work across the front sts, then the first sleeve sts, then the back sts, then the second sleeve sts. Place markers between each section as you go. You should now have a total of 242 (264, 294, 316, 346) sts on your needle.
Step 12: Knit 1 round even to establish the yoke.
Step 13: Decrease round: *K to 2 sts before the marker, K2tog, SM, SSK* repeat 3 more times across the round. This creates 8 decreases per decrease round, shaping the yoke to fit your shoulders and neckline.
Step 14: Repeat this decrease round every other round 8 (9, 10, 11, 12) times, then every round 6 (7, 8, 9, 10) times. You will have 130 (136, 150, 156, 170) sts remaining. The yoke will now have a gentle, rounded shape that sits beautifully at the neckline.
Step 15: Work in seed stitch for 1 inch to create a delicate, textured neckline band. BO loosely in pattern to maintain the stretchy edge.
Finishing
Step 16: Weave in all loose ends using your tapestry needle. Take your time with this step—neat finishing makes a professional-looking garment.
Step 17: Block your cardigan to the specified measurements. Wet blocking or steam blocking will help even out your stitches and give the cardigan its final, beautiful drape. Lay flat to dry.
Pom Pom Trim
Step 18: Make 10 (12, 14, 16, 18) pom poms using your CC yarn. Each pom pom should be approximately 2 inches in diameter. For perfectly round pom poms, use a pom pom maker and trim any stray strands with scissors.
Step 19: Attach the pom poms evenly along the front edges and bottom hem, spacing them about 3 inches apart. Use a tapestry needle and a length of CC yarn to securely sew each pom pom to the cardigan, making sure to catch the yarn firmly so they stay put through wear and washing.
Step 20 (Optional): Add a single pom pom to each sleeve cuff for extra charm. This delightful detail ties the whole design together and adds a playful touch every time you move your arms.
Tips for Success
- Count your stitches after each decrease round to ensure accuracy—it's much easier to catch mistakes early.
- Use locking stitch markers for the yoke decreases so they don't slip out while you're working.
- Block before attaching pom poms to ensure the cardigan is at its final size and shape.
- Make extra pom poms in case some need replacing later—they can be a fun way to use up leftover yarn.
- Keep your gauge swatch as a reference for washing instructions.
Your Whispering Willow Cardigan is now complete! This cozy, whimsical layer is sure to become a treasured piece in your handmade wardrobe. The combination of the smooth sage green body, textured seed stitch details, and fluffy cream pom poms creates a garment that's both stylish and deeply comforting. Whether you're knitting this for yourself or as a heartfelt gift, every stitch carries the warmth of handmade love.
We'd love to see your finished cardigan! Share your creation on social media with the hashtag #WhisperingWillowCardigan and inspire fellow knitters with your beautiful work. Happy knitting!


