Cardigan Knitting Patterns
The Sunburst Granny Square Cardigan Free Pattern
Anonymous
•
July 03, 2026
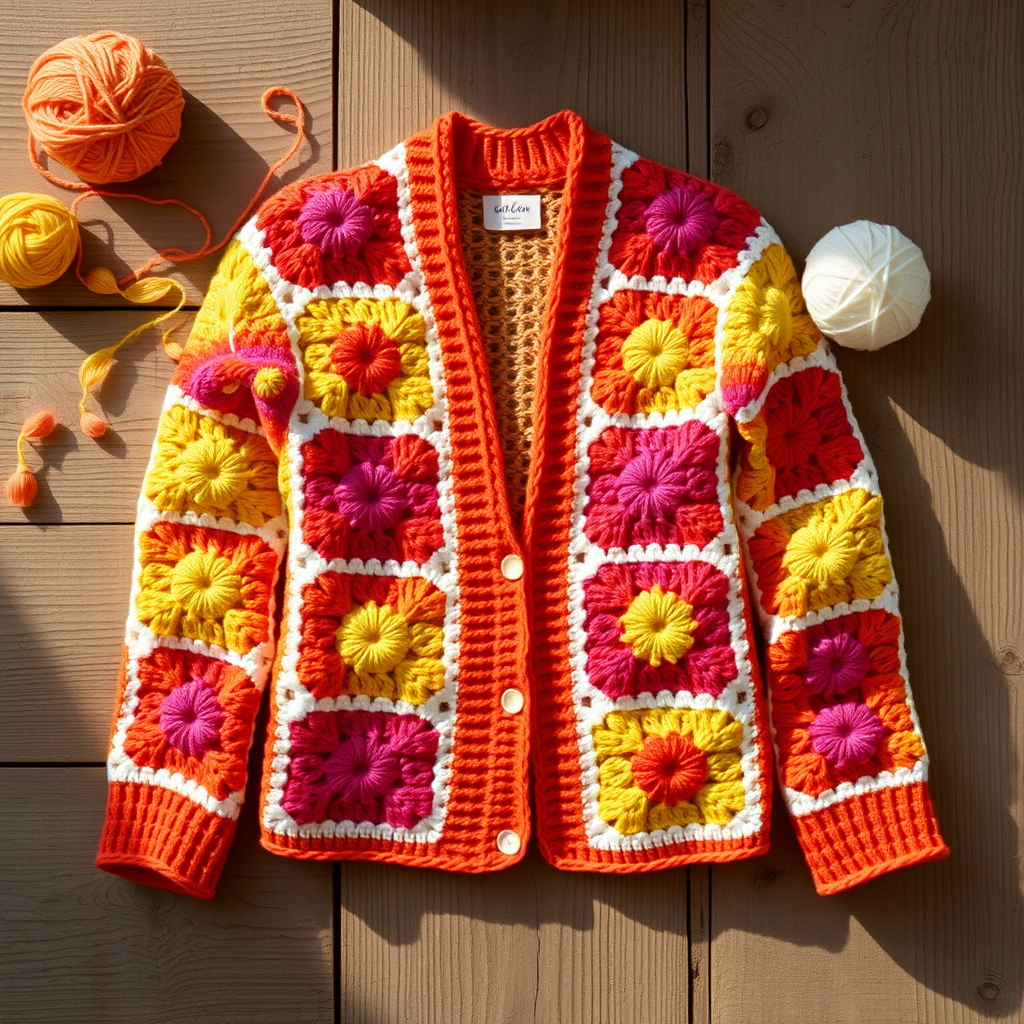
The Sunburst Granny Square Cardigan Free Pattern
Embrace the warmth of the sun with this vibrant Sunburst Granny Square Cardigan. Perfect for adding a splash of color to any outfit, this project combines classic granny squares with a modern twist. Whether you're a seasoned crocheter or a beginner, this pattern is designed to guide you through each step with ease.
Materials Needed
- Yarn: Worsted weight yarn in various colors: yellow, orange, red, pink, and white.
- Hook: 5.0 mm crochet hook.
- Gauge: 4 granny squares = 10 inches.
- Tapestry needle: For weaving in ends.
Step-by-Step Instructions
1. Granny Square (Make 30)
Follow these steps to create each granny square:
- Round 1:
- With yellow yarn, make a magic ring.
- Chain 3 (this counts as your first double crochet).
- Work 2 double crochets (dc) into the ring.
- Chain 2.
- Repeat: *3 dc into the ring, chain 2; repeat from * two more times.
- Join with a slip stitch (sl st) to the top of the chain-3.
- Fasten off yellow yarn.
- Round 2:
- Join orange yarn in any chain-2 space.
- Chain 3, then work 2 dc in the same space.
- Chain 1.
- Repeat: *3 dc in the next chain-2 space, chain 2, 3 dc in the same space, chain 1; repeat from * around.
- Join with a sl st to the top of the chain-3.
- Fasten off orange yarn.
- Round 3:
- Join red yarn in any chain-1 space.
- Chain 3, then work 2 dc in the same space.
- Chain 1.
- Repeat: *3 dc in the next chain-2 space, chain 2, 3 dc in the same space, chain 1, 3 dc in the next chain-1 space, chain 1; repeat from * around.
- Join with a sl st to the top of the chain-3.
- Fasten off red yarn.
- Round 4:
- Join pink yarn in any chain-1 space.
- Chain 3, then work 2 dc in the same space.
- Chain 1.
- Repeat: *3 dc in the next chain-2 space, chain 2, 3 dc in the same space, chain 1, 3 dc in the next chain-1 space, chain 1; repeat from * around.
- Join with a sl st to the top of the chain-3.
- Fasten off pink yarn.
- Round 5:
- Join white yarn in any chain-1 space.
- Chain 3, then work 2 dc in the same space.
- Chain 1.
- Repeat: *3 dc in the next chain-2 space, chain 2, 3 dc in the same space, chain 1, 3 dc in the next chain-1 space, chain 1; repeat from * around.
- Join with a sl st to the top of the chain-3.
- Fasten off white yarn.
2. Assembly
Once you have completed all 30 granny squares, it's time to assemble your cardigan:
- Lay out the squares in a 5x6 grid to visualize the final layout.
- Sew the squares together using a whip stitch or your preferred method. Ensure the squares are aligned properly for a neat finish.
3. Sleeves (Make 2)
To create the sleeves for your cardigan:
- Fold the cardigan in half and sew the sides together, leaving space for armholes.
- Attach yarn at the armhole opening.
- Chain 3, then work double crochet evenly around the armhole.
- Join with a sl st to complete the round.
- Repeat for the desired sleeve length, ensuring both sleeves are of equal length.
4. Finishing
Complete your cardigan with these final touches:
- Weave in all loose ends using a tapestry needle.
- If necessary, block the cardigan to shape it properly, ensuring all squares lay flat and the cardigan fits comfortably.
Congratulations! You have now created your very own Sunburst Granny Square Cardigan. Wear it proudly and enjoy the warmth and vibrancy it brings to your wardrobe!


