The Retro Daisy Granny Square Bag Free Pattern
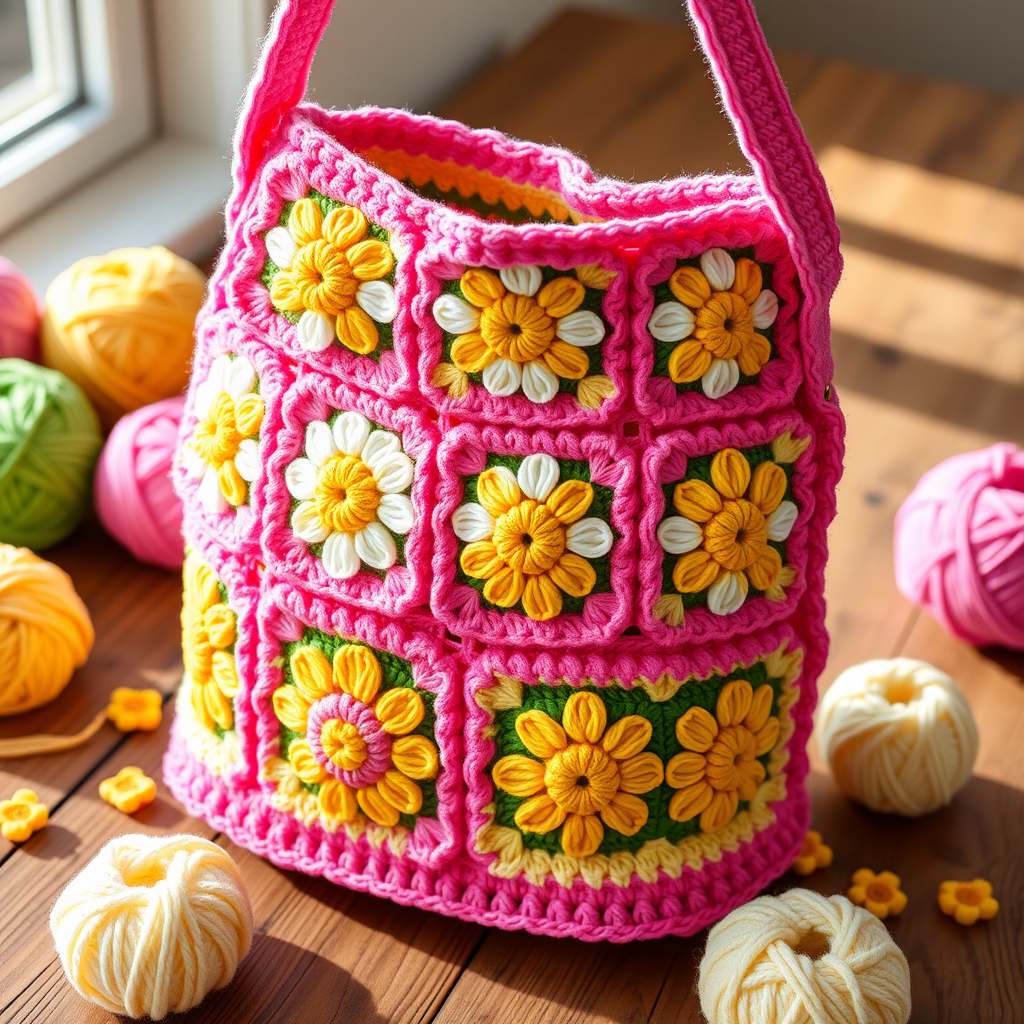
The Retro Daisy Granny Square Bag Free Pattern
Introduction
Embrace the Y2K nostalgia with this charming Retro Daisy Granny Square Bag, perfect for adding a touch of vintage flair to any outfit. This crochet project combines vibrant colors and classic motifs to create a stylish and functional accessory. Whether you're heading out for a casual day or a special occasion, this bag is sure to turn heads!
Materials Needed
- Yarn: Worsted weight cotton yarn in various colors (e.g., white, yellow, green, pink)
- Hook: 5.0 mm crochet hook
- Gauge: 4 granny squares = 10 cm x 10 cm
Step-by-Step Instructions
Step 1: Create the Daisy Granny Squares
To make the granny squares, follow these rounds:
- Round 1: Using yellow yarn, create a magic ring. Chain 3 (this counts as your first double crochet), then crochet 11 double crochets (dc) into the ring. Join with a slip stitch (sl st) to the top of the chain 3. You should have a total of 12 dc.
- Round 2: Change to white yarn. Chain 3, then dc in the same stitch. Now, crochet 2 dc in each stitch around. Join with a sl st to the top of the chain 3. You should have 24 dc at the end of this round.
- Round 3: Change to green yarn. Chain 3, then dc in the same stitch. Now, *dc in the next stitch, 2 dc in the next stitch*; repeat this pattern around. Join with a sl st to the top of the chain 3. You should have 36 dc.
- Round 4: Change to pink yarn. Chain 3, then dc in the next 2 stitches. Now, *(2 dc, chain 2, 2 dc) in the next stitch, dc in the next 8 stitches*; repeat this pattern 3 more times. Join with a sl st to the top of the chain 3. Fasten off your yarn.
Step 2: Assemble the Bag
Make a total of 13 granny squares. Arrange them in a 3x3 grid for the front and back panels of the bag. Use the remaining squares to form the sides and bottom of the bag.
Step 3: Join Squares
To join the squares together, you can use either a whip stitch or a slip stitch. Align the squares as per your arrangement and carefully stitch them together, ensuring that the edges are neat and aligned.
Step 4: Add the Strap
For the strap, crochet a long chain. Start with a foundation chain of about 80 stitches (or adjust to your desired length). Then, single crochet (sc) in each chain across. Repeat this for about 5 rows or until the strap reaches your desired width. Attach the strap securely to the top sides of the bag using slip stitches or by sewing it in place.
Step 5: Finishing Touches
Weave in all loose ends using a yarn needle. To give your bag a polished look, block the bag to shape it properly. This will help even out the stitches and enhance the overall appearance of your Retro Daisy Granny Square Bag.
Now you have your very own Retro Daisy Granny Square Bag! Enjoy showcasing your handmade creation and the vintage charm it brings to your wardrobe.


