The Ember Dune Poncho: A Free Knitting Pattern for a Textured, Asymmetrical Desert-Inspired Wrap
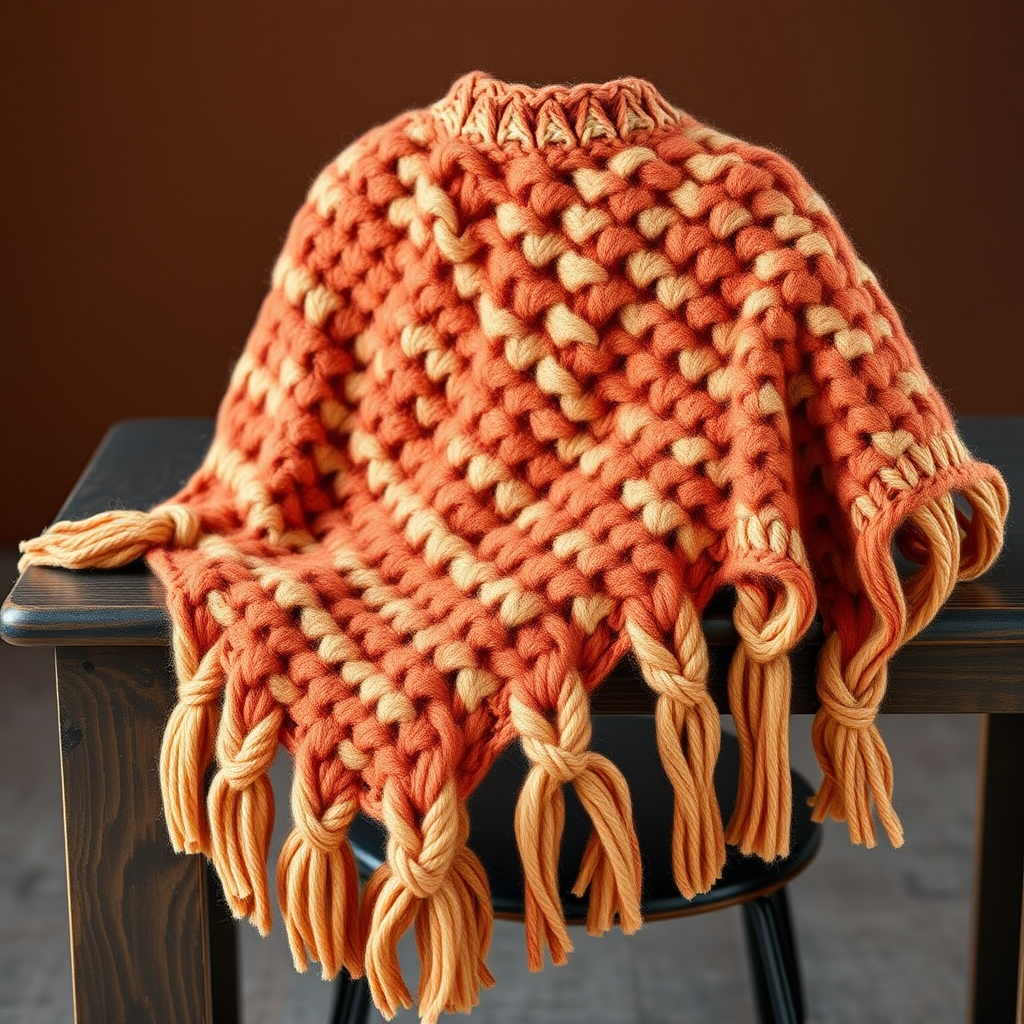
Wrap Yourself in Warmth: Introducing the Ember Dune Poncho
Imagine the warm, shifting colors of a desert sunset captured in a cozy, modern wrap. That's the magic of the Ember Dune Poncho. This free knitting pattern is designed to be both inspiring and achievable, especially for beginners looking to create a stunning, textured garment. With its dramatic asymmetrical hem and rich, woven-like stitch pattern, this poncho is the perfect layering piece for transitional weather. It's a project that feels special and looks complex, but is built on simple, repeatable techniques. Let's dive in and create your own desert-inspired masterpiece.
Materials Needed
Before you begin, gather your supplies. This pattern uses worsted weight yarn and a circular needle to accommodate the large number of stitches.
- Yarn: Worsted weight (Category 4) yarn in three colors:
- Color A (Terracotta): 450 yards (Sample used Lion Brand Wool-Ease in 'Spice')
- Color B (Burnt Orange): 350 yards (Sample used Lion Brand Wool-Ease in 'Pumpkin')
- Color C (Sand): 300 yards (Sample used Lion Brand Wool-Ease in 'Oatmeal')
- Needle: US Size 9 (5.5 mm) circular knitting needle, 32-inch length (or longer for comfortable stitch holding)
- Notions: Stitch markers (optional), tapestry needle for weaving in ends, scissors
- Gauge: 16 stitches and 22 rows = 4 inches in stockinette stitch (blocked). Exact gauge is not critical for this oversized design, but consistency is important.
Step-by-Step Instructions
This poncho is worked flat in one piece from the top down, then seamed at the shoulders. The asymmetrical shape is created by working short rows. Follow these detailed instructions carefully.
Abbreviations
- CO: Cast on
- K: Knit
- P: Purl
- St(s): Stitch(es)
- W&T: Wrap and turn (bring yarn to front, slip next stitch purlwise, bring yarn to back, return slipped stitch to left needle, turn work)
- K2tog: Knit two stitches together
- SSK: Slip, slip, knit (slip two stitches knitwise one at a time, then knit them together through back loops)
- BO: Bind off
Section 1: Back Panel (worked from top to bottom)
- Cast On: With Color A, CO 60 sts.
- Ribbing (4 inches):
- Row 1 (RS): K2, *P2, K2; repeat from * to end.
- Row 2 (WS): P2, *K2, P2; repeat from * to end.
- Repeat Rows 1-2 for 4 inches, ending with a WS row.
- Begin Textured Pattern (3 repeats):
- Row 3 (RS): With Color A, K all sts.
- Row 4 (WS): With Color A, P all sts.
- Row 5 (RS): With Color B, K1, *slip 1 st purlwise with yarn in back, K1; repeat from * to last st, K1.
- Row 6 (WS): With Color B, P1, *slip 1 st purlwise with yarn in front, P1; repeat from * to last st, P1.
- Row 7 (RS): With Color A, K all sts.
- Row 8 (WS): With Color A, P all sts.
- Row 9 (RS): With Color C, K1, *K1, slip 1 st purlwise with yarn in back; repeat from * to last st, K1.
- Row 10 (WS): With Color C, P1, *P1, slip 1 st purlwise with yarn in front; repeat from * to last st, P1.
- Repeat Rows 3-10 for pattern, working 2 more repeats (total 3 pattern repeats).
- Stockinette Section with Increases:
- Continue in stockinette stitch (K on RS, P on WS) with Color A for 6 inches.
- While working stockinette, increase 1 st at each end every 4th row (use M1L on the right side and M1R on the left side).
- You will have 90 sts after completing the increases.
Section 2: Asymmetrical Hem (Short Rows for Back Panel)
- Continue with Color A.
- Short Row 1 (RS): K to last 10 sts, W&T.
- Short Row 2 (WS): P to last 10 sts, W&T.
- Short Row 3 (RS): K to 5 sts before last wrapped st, W&T.
- Short Row 4 (WS): P to 5 sts before last wrapped st, W&T.
- Repeat Short Rows 3-4 until 20 sts remain unwrapped in the center.
- Final Row (RS): K across all sts, picking up wraps (knit the wrap together with the stitch it wraps).
- Bind Off: BO loosely.
Section 3: Front Panel
- Work exactly as Back Panel, but do not work the short rows.
- Instead, after completing the stockinette section with increases, work 2 more pattern repeats (total 5 pattern repeats).
- Bind Off: BO loosely.
Finishing
- Seaming: Lay pieces flat with RS facing up. Place Front Panel on top of Back Panel, aligning top edges. Sew shoulder seams 6 inches from each side, leaving the center 18 inches open for the neck.
- Weave in Ends: Use a tapestry needle to weave in all yarn ends securely.
- Blocking: Block gently to shape, emphasizing the asymmetrical hem. Lay flat to dry.
Optional Fringe
- Cut 12-inch lengths of all three colors (mix them for a variegated look).
- Fold each length in half, pull the loop through edge stitches along the bottom hem, and pull the ends through the loop to knot.
- Trim fringe evenly for a polished finish.
Your Ember Dune Poncho is now complete! Enjoy the cozy, textured warmth and the beautiful desert-inspired colors. This piece is perfect for layering over jeans or a simple dress, adding a touch of handcrafted elegance to any outfit.


