Mossy Glen Cable Knit Market Bag Free Pattern – A Textured Forest Tote
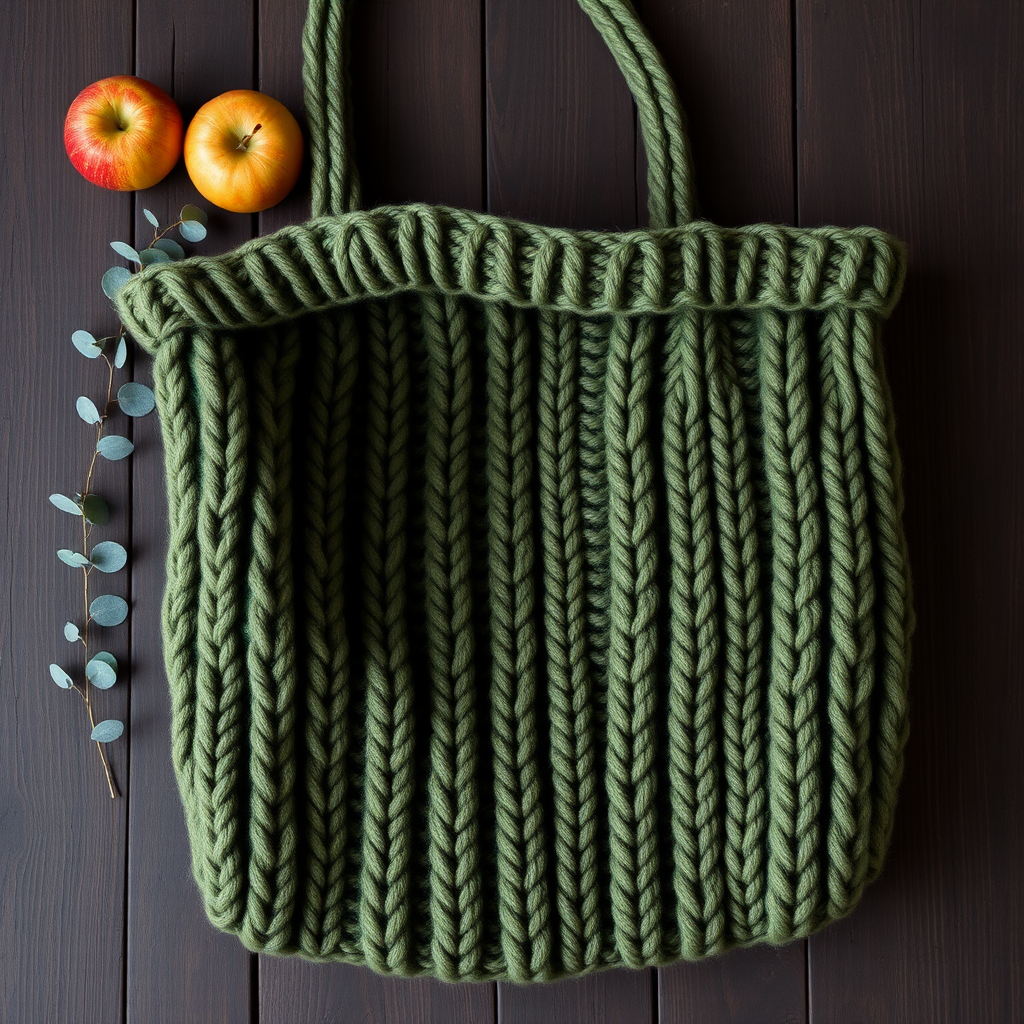
Mossy Glen Cable Knit Market Bag Free Pattern – A Textured Forest Tote
Imagine strolling through a sun-dappled forest, the earthy scent of moss and pine filling the air. That's the feeling you'll carry with you every time you use this beautifully textured cable knit market bag. Inspired by the intricate patterns of tree bark and woodland ferns, this deep forest green tote is as stylish as it is sturdy. Whether you're heading to the farmers market, the library, or a cozy picnic, this roomy, handcrafted bag is the perfect eco-friendly companion. With its rich cable panels and soft, structured drape, it's a knitting project you'll be proud to show off. Let's get started on creating your own piece of woodland charm!
Materials Needed
Before you begin, gather the following supplies to ensure a smooth and enjoyable knitting experience. This pattern is designed for a worsted weight cotton yarn, which gives the bag excellent structure and durability.
- Yarn: Worsted weight cotton or cotton-blend yarn (approx. 300-350 yards) in a deep forest green. The cotton content is key for a sturdy, non-stretchy bag that holds its shape.
- Needles: US 7 (4.5 mm) circular knitting needle, 24-inch length. The circular needle is essential for working the bag body in the round. You will also need a cable needle for the intricate cable patterns.
- Notions: Stitch markers (at least one), a tapestry needle for weaving in ends and sewing handles, and scissors.
- Gauge: 20 stitches and 26 rows = 4 inches in stockinette stitch. Always check your gauge to ensure your bag turns out the correct size.
Step-by-Step Instructions
This pattern is worked from the bottom up, starting with a ribbed base, moving into the beautiful cable pattern, and finishing with the handles. Don't be intimidated by the cables—they're easier than they look and create a stunning result. Follow these detailed instructions carefully, and you'll have a gorgeous bag in no time.
Bag Body (Worked in the Round)
We'll begin by casting on and creating the sturdy ribbed foundation, then move into the main cable pattern.
- Cast On: Cast on 96 stitches. Place a marker and join in the round, being careful not to twist your stitches. This is the most common mistake, so double-check that your cast-on edge is straight before joining.
- Ribbed Base: Work K2, P2 ribbing for 8 rounds. This creates a neat, elastic edge that will form the bottom of the bag.
- Round 1 (Setup): *K6, P2, K6, P2* repeat from * to * around (12 repeats total). This sets up the pattern for the cables.
- Round 2: *K6, P2, K6, P2* repeat around. This is a plain round, just knitting the knits and purling the purls.
- Round 3 (Cable Round 1): *Slip next 3 stitches onto cable needle and hold in front, K3 from left needle, K3 from cable needle, P2, K6, P2* repeat from * to * around. This creates the first cable twist. Holding the stitches in front makes the cable lean to the left.
- Rounds 4-6: *K6, P2, K6, P2* repeat around. Work these plain rounds to let the cable settle and create the fabric.
- Round 7 (Cable Round 2): *K6, P2, slip next 3 stitches onto cable needle and hold in front, K3 from left needle, K3 from cable needle, P2* repeat from * to * around. Notice that this time, the cable is worked on the second set of K6 stitches, creating a staggered, interlocking effect.
- Rounds 8-10: *K6, P2, K6, P2* repeat around. Another set of plain rounds.
- Repeat: Repeat Rounds 3-10 until the bag measures 12 inches from the cast-on edge, ending with a Round 10. This will create the full, textured body of the bag. The staggered cables will form a beautiful, continuous pattern.
- Decrease Round: Next round: *K2tog, K4, P2, K2tog, K4, P2* repeat around (you will have 84 stitches). This gently shapes the top of the bag, bringing it in slightly.
- Top Ribbing: Work K2, P2 ribbing for 6 rounds. This matches the bottom ribbing and gives a polished finish.
- Bind Off: Bind off loosely in pattern (knit the knits and purl the purls). A loose bind-off is crucial so the top of the bag isn't too tight.
Handles (Make 2)
Now we'll create the sturdy, comfortable handles that make this bag so practical. They are worked flat in stockinette stitch, which creates a strong, rolled fabric.
- Pick Up Stitches: Pick up and knit 10 stitches along the top edge of the bag, centered on one side (between two cable panels). Make sure the stitches are picked up evenly so the handle is straight.
- Work Handle: Work back and forth in stockinette stitch (knit one row, purl one row) for 18 inches, or until the handle reaches your desired length. For a shoulder bag, 18 inches is a good starting point. You can make them longer or shorter to suit your preference.
- Bind Off: Bind off all stitches, leaving a long tail (at least 12 inches) for sewing.
- Attach Handle: Sew the end of the handle to the opposite side of the bag top, matching the position. Use the long tail and a tapestry needle to securely stitch the handle in place, weaving the yarn through the stitches for a strong hold.
- Repeat: Repeat for the second handle on the other side of the bag. Make sure both handles are the same length and are attached symmetrically.
Finishing
These final steps will give your bag a professional, polished look.
- Weave in Ends: Weave in all loose ends with a tapestry needle. Be sure to weave them in securely on the inside of the bag so they don't show.
- Blocking: Block the bag gently to even out the cables and set the shape. To block, wet the bag with lukewarm water, gently squeeze out excess (don't wring), and lay it flat on a towel. Shape it to the desired dimensions and let it air dry completely. This will make the cables look crisp and defined.
And there you have it—a beautiful, functional Mossy Glen Cable Knit Market Bag that's perfect for all your adventures. The rich texture and earthy color make it a timeless accessory you'll reach for again and again. Happy knitting!


