Heartfelt Hearth Glasses Cozy Free Pattern – Knit a Chunky Cable Eyewear Pouch
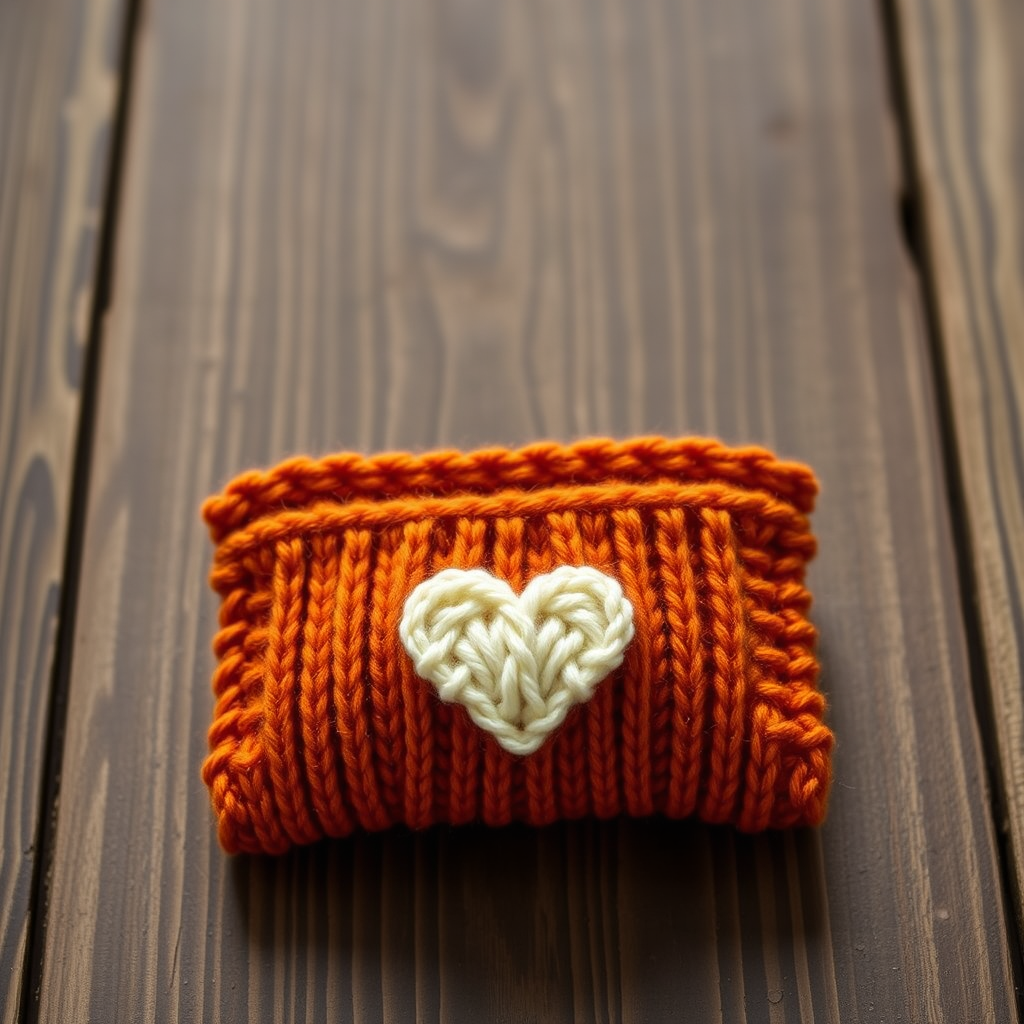
Heartfelt Hearth Glasses Cozy Free Pattern – Knit a Chunky Cable Eyewear Pouch
Wrap your spectacles in warmth with this charming cable-knit eyeglass holder, featuring a delicate heart motif and a plush, handcrafted feel. This quick project is perfect for gifting or treating yourself to a touch of handmade luxury. Whether you're a seasoned knitter or just starting your journey, this pattern is designed to be accessible, rewarding, and utterly delightful to create.
This pattern creates a flat, rectangular eyeglass holder that is folded and seamed. The heart motif is worked in the center using a simple stranded technique, making it an excellent introduction to colorwork without being overwhelming. The result is a soft, padded pouch that protects your glasses in style, with a rounded top flap that adds a touch of elegance.
Materials Needed
Before you begin, gather the following supplies to ensure a smooth and enjoyable knitting experience:
- Yarn: Worsted weight yarn in a warm terracotta tone (approx. 100g) and a small amount of cream yarn for the heart accent. The main color (MC) creates the cozy body, while the contrast color (CC) brings the heart to life.
- Needles: US 7 (4.5mm) knitting needles. These are perfect for achieving the gauge and creating a dense, durable fabric.
- Notions: A tapestry needle for weaving in ends and seaming the pieces together.
- Optional: A button and a small loop for closure, if you wish to add a functional and decorative finish to the flap.
Gauge: 20 stitches and 26 rows = 4 inches in stockinette stitch. Always check your gauge to ensure your finished piece matches the intended dimensions.
Step-by-Step Instructions
This pattern is broken down into manageable sections. Follow each step carefully, and you'll have a beautiful eyeglass holder in no time. Let's start with the abbreviations you'll need to know.
Abbreviations
- CO: Cast on
- K: Knit
- P: Purl
- K2tog: Knit two together (a right-leaning decrease)
- SSK: Slip, slip, knit (a left-leaning decrease)
- St(s): Stitch(es)
- MC: Main color (terracotta)
- CC: Contrast color (cream)
- RS: Right side (the front of the work)
- WS: Wrong side (the back of the work)
Front Panel (Make 1)
This is the piece that will feature the beautiful heart motif. Take your time with the colorwork section, and remember to carry the unused yarn loosely across the back to avoid puckering.
Cast On and Base:
CO 30 sts with MC.
Row 1 (RS): K all.
Row 2 (WS): P all.
Repeat Rows 1-2 until piece measures 3 inches from cast-on edge, ending with a WS row. This creates the solid base of the front panel.
Heart Motif Section:
Now we'll introduce the cream yarn to create the heart. Keep your tension even and remember to twist the yarns at the color changes to prevent holes.
Row 1 (RS): K 10 MC, K 10 CC, K 10 MC.
Row 2 (WS): P 10 MC, P 10 CC, P 10 MC.
Row 3: K 10 MC, K 2 CC, K 6 MC, K 2 CC, K 10 MC.
Row 4: P 10 MC, P 2 CC, P 6 MC, P 2 CC, P 10 MC.
Row 5: K 10 MC, K 4 CC, K 2 MC, K 4 CC, K 10 MC.
Row 6: P 10 MC, P 4 CC, P 2 MC, P 4 CC, P 10 MC.
Row 7: K 10 MC, K 10 CC, K 10 MC.
Row 8: P all with MC. This row closes the heart motif and returns you to solid MC.
Continue with MC only:
Repeat Rows 1-2 of the stockinette section (K on RS, P on WS) until piece measures 6 inches from cast-on edge, ending with a WS row. This completes the main body of the front panel.
Top Flap Shaping:
This section creates the rounded top flap that will fold over to close the case.
Row 1 (RS): K2tog, K to last 2 sts, SSK. (28 sts)
Row 2 (WS): P all.
Repeat Rows 1-2 until 10 sts remain. You will notice the piece tapering into a triangle shape.
Next Row (RS): K2tog across (5 sts).
Cut yarn, leaving a long tail. Thread the tail through the remaining 5 sts and pull tight to close. This creates a neat, gathered point at the top of the flap.
Back Panel (Make 1)
The back panel is simpler, with no colorwork, but it mirrors the shape of the front panel.
Cast On and Body:
CO 30 sts with MC.
Work in stockinette stitch (K on RS, P on WS) until piece measures 6 inches from cast-on edge, ending with a WS row.
Top Flap Shaping:
Work the same top flap shaping as for the front panel:
Row 1 (RS): K2tog, K to last 2 sts, SSK. (28 sts)
Row 2 (WS): P all.
Repeat Rows 1-2 until 10 sts remain.
Next Row (RS): K2tog across (5 sts).
Cut yarn, thread through remaining sts, and pull tight to close.
Finishing
Now it's time to bring your pieces together. This is where the magic happens, transforming two flat panels into a functional and beautiful pouch.
Blocking:
Block both pieces flat to the correct measurements. This means wetting or steaming the pieces and pinning them to the desired dimensions until dry. This step is crucial for even stitches and a professional finish.
Seaming:
Place the front and back panels together with wrong sides facing. Using a tapestry needle and MC yarn, whip stitch along the side and bottom edges, leaving the top flap open. The whip stitch is simple and effective: bring the needle through both layers, over the edge, and back through, creating a spiral of yarn along the seam. Ensure your stitches are even and not too tight to keep the fabric flexible.
Weave in Ends:
Weave in all loose ends using your tapestry needle. This is essential for a clean, durable finish. Thread the needle with the yarn tail, weave it through the wrong side of the fabric for about an inch, then trim the excess.
Optional Closure:
If you'd like a secure closure, add a button and a small loop at the top flap. To make a loop, simply chain a few stitches with your yarn or create a small braided cord, and sew it to the inside of the flap. Then sew a button to the front panel to match.
Heart Embellishment (Optional)
If you prefer a more prominent heart, you can knit a small heart patch separately and sew it onto the front panel instead of the stranded motif. This is a great alternative if you want to practice shaping or prefer a textured appliqué.
- CO 5 sts with CC.
- Increase to 9 sts by knitting into the front and back of the first and last stitches on the next row.
- Shape the heart with decreases (K2tog and SSK) on subsequent rows to create the rounded top lobes and pointed bottom.
- Sew it centered on the front panel using a tapestry needle and matching thread.
Your Heartfelt Hearth Glasses Cozy is now complete! This project is a wonderful way to practice colorwork and shaping while creating a practical, heartfelt gift. The warm terracotta and cream combination makes it a cozy addition to any desk or bag. Enjoy your handmade luxury, and happy knitting!


