Frosted Fir Bell Ornament Free Pattern – Knit a Nordic Winter Charm
Frosted Fir Bell Ornament Free Pattern – Knit a Nordic Winter Charm
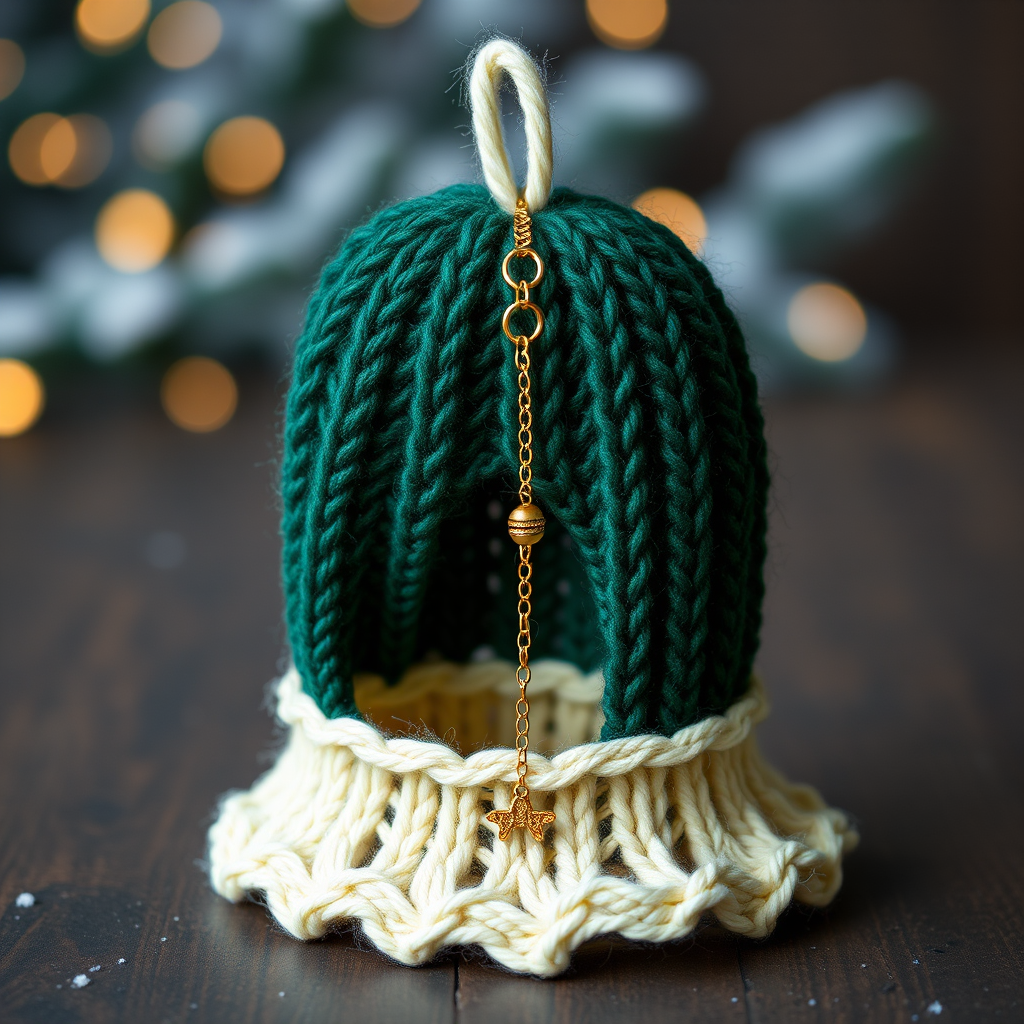
Bring the quiet magic of a snowy forest to your tree with this knitted bell ornament, featuring a delicate pine needle texture and a frosty white rim. It's a quick, satisfying project that adds a handcrafted touch to any holiday setting. Whether you're a seasoned knitter or just starting your journey, this pattern is designed to be approachable and rewarding, resulting in a charming decoration that captures the essence of a Nordic winter.
This ornament is knitted in the round from the top down, then shaped with decreases to form a bell silhouette. A small loop for hanging is knitted at the top, and a crocheted chain creates the clapper. The combination of deep forest green, creamy white, and a touch of gold creates a timeless, festive look that will complement any holiday décor.
Materials Needed
Before you begin, gather the following materials. This project is perfect for using up small amounts of worsted weight yarn from your stash.
- Yarn: Worsted weight yarn in Forest Green (MC), Cream (CC1), and Gold (CC2) – approx. 20g MC, 10g CC1, 5g CC2
- Needles: US 5 (3.75 mm) double-pointed needles (or circular for magic loop)
- Gauge: 22 stitches and 30 rows = 4 inches in stockinette stitch (not crucial for this project)
- Other: Stitch marker, tapestry needle for weaving in ends, small bead (optional, for the clapper)
Step-by-Step Instructions
Follow these detailed instructions to create your own Frosted Fir Bell Ornament. The pattern is worked in the round, so you'll be knitting continuously without turning your work.
Abbreviations
- CO: cast on
- K: knit
- P: purl
- K2tog: knit two together (decrease)
- Kfb: knit into front and back of stitch (increase)
- St(s): stitch(es)
- Rnd(s): round(s)
- BO: bind off
Top Loop
We'll start by creating the hanging loop at the top of the bell.
- With CC2 (Gold), CO 6 sts. Distribute onto 2 needles (3 sts each).
- Knit an I-cord for 1 inch (about 6 rows). To do this, knit across the 3 stitches on the first needle, then slide them to the other end of the needle and knit them again, pulling the yarn tightly across the back. Repeat this process for each row.
- Cut yarn, leaving a 6-inch tail. Thread tail through live stitches using a tapestry needle, pull tight to gather, and secure. Set aside.
Bell Body
Now we'll create the main body of the bell, starting from the top and working down.
- With MC (Forest Green), CO 12 sts. Join in the round, being careful not to twist. Place marker for beginning of round.
- Rnd 1: Kfb in each st around – 24 sts.
- Rnd 2: K all sts.
- Rnd 3: *Kfb, K1* repeat around – 36 sts.
- Rnd 4: K all sts.
- Rnd 5: *Kfb, K2* repeat around – 48 sts.
- Rnds 6-10: K all sts (5 rounds plain).
Pine Needle Texture
This section creates the beautiful textured pattern that evokes pine needles. The ribbing is offset in alternating rounds to create a subtle, organic texture.
- Rnd 11: *K1, P1* repeat around.
- Rnd 12: *P1, K1* repeat around (offset the ribbing).
- Rnd 13: *K1, P1* repeat around.
- Rnd 14: *P1, K1* repeat around.
- Rnd 15: *K1, P1* repeat around.
- Rnd 16: *P1, K1* repeat around.
- Rnd 17: K all sts.
- Rnd 18: *K2tog, K2* repeat around – 36 sts.
- Rnd 19: K all sts.
- Rnd 20: *K2tog, K1* repeat around – 24 sts.
- Rnd 21: K all sts.
- Rnd 22: *K2tog* repeat around – 12 sts.
- Rnd 23: K all sts.
Frosty Rim
Now we'll switch to the cream yarn to create the flared, snowy rim of the bell.
- Switch to CC1 (Cream).
- Rnd 24: *Kfb* repeat around – 24 sts.
- Rnd 25: K all sts.
- Rnd 26: *Kfb, K1* repeat around – 36 sts.
- Rnd 27: K all sts.
- Rnd 28: BO all sts loosely (knitwise).
Finishing
These final steps will bring your ornament together and add the charming details.
- Weave in all ends using a tapestry needle.
- Attach the gold I-cord loop to the top of the bell by sewing it securely inside the first round.
- Clapper: With CC2 (Gold), crochet a chain of 6 stitches. Attach one end to the inside center of the bell's bottom rim, letting the chain hang down. Optionally, add a small bead to the end of the chain for a gentle jingle.
- Gently block the bell to shape, if desired. To block, wet the ornament, gently squeeze out excess water, and shape it on a flat surface to dry.
Your Frosted Fir Bell Ornament is now complete! This charming piece is perfect for adding a handcrafted touch to your holiday tree, or as a thoughtful, handmade gift for loved ones. The combination of textures and colors creates a truly special ornament that will be treasured for years to come.


