Enchanted Meadow Mug Rug Free Pattern – Knit a Blooming Flower Coaster
Enchanted Meadow Mug Rug Free Pattern – Knit a Blooming Flower Coaster
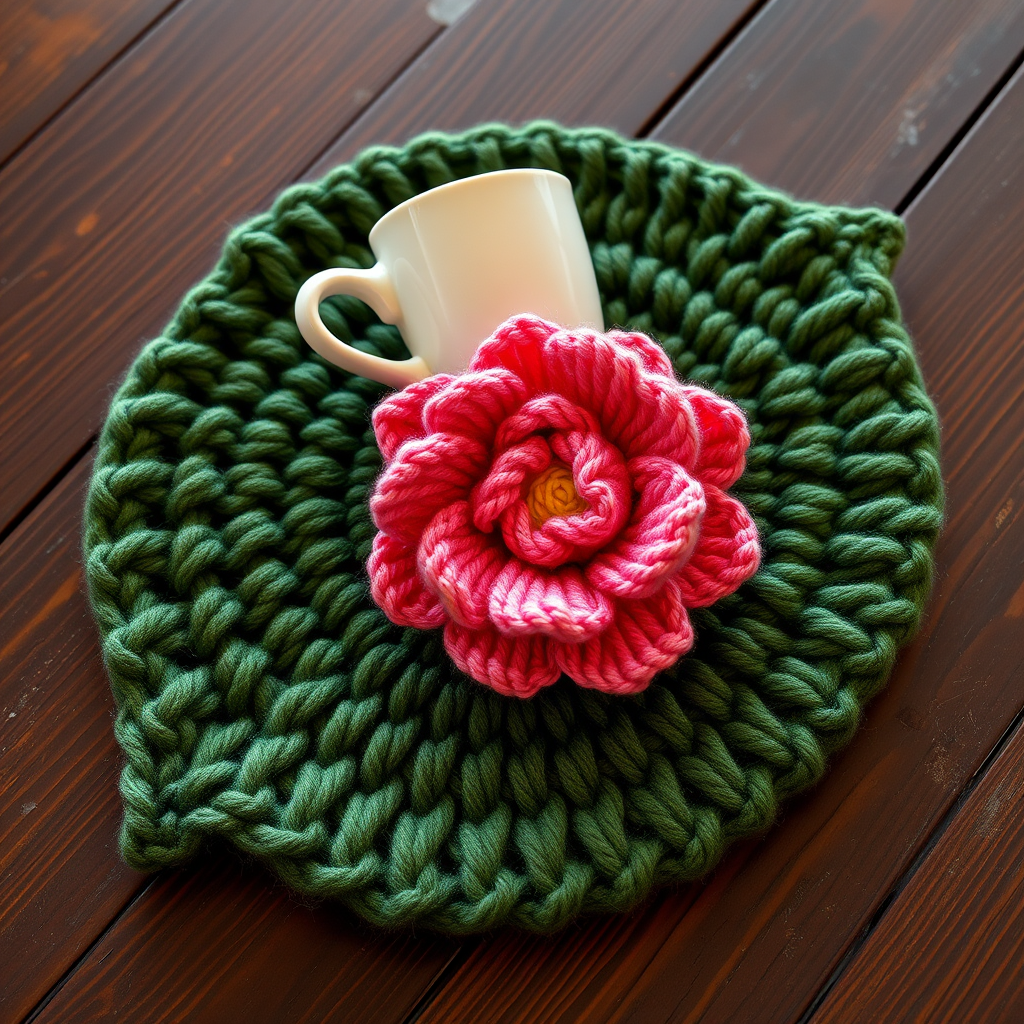
Transform your coffee break into a garden escape with this charming knitted flower mug rug, featuring a lush textured bloom at its heart. This quick and satisfying project adds a handcrafted touch to any tabletop. Whether you're looking for a thoughtful handmade gift or a delightful way to elevate your daily tea ritual, this pattern is perfect for knitters of all skill levels—especially beginners eager to explore new techniques like yarn overs and decreases.
The Enchanted Meadow Mug Rug combines a sturdy garter-stitch base in deep forest green with a whimsical ruffled flower in soft petal pink, finished with a sunny buttercup yellow center. The result is a dimensional, tactile piece that protects your surfaces while bringing a slice of nature indoors. Best of all, it works up quickly—perfect for an afternoon project or a relaxing weekend knit.
Materials Needed
Before you begin, gather the following supplies. All materials are readily available at your local yarn shop or online.
Yarn
- Worsted weight cotton yarn in three colors:
- Petal Pink (A): Approximately 50 yards
- Buttercup Yellow (B): Approximately 20 yards
- Leaf Green (C): Approximately 30 yards
Tip: Cotton yarn is ideal for mug rugs because it's absorbent, durable, and holds its shape well. However, any worsted weight yarn will work if you prefer a softer feel.
Needles & Notions
- US Size 7 (4.5 mm) knitting needles—straight or circular, whichever you prefer
- Tapestry needle for weaving in ends and sewing pieces together
- Scissors
- Stitch markers (optional, but helpful for keeping track of rows)
Gauge
20 stitches and 28 rows = 4 inches in stockinette stitch. Gauge is not critical for this project, but aim for a firm, dense fabric so the mug rug lies flat and provides good insulation. If your fabric feels too loose, try smaller needles; if it's too stiff, go up a size.
Step-by-Step Instructions
This mug rug is knitted flat in two pieces: a circular base and a flower motif, which are then sewn together. The base is worked in garter stitch for a sturdy, non-curl surface. Follow along carefully, and you'll have a beautiful finished piece in no time.
Abbreviations
- k: knit
- k2tog: knit two stitches together (decrease)
- ssk: slip, slip, knit (decrease)
- yo: yarn over (increase)
- RS: right side
- st(s): stitch(es)
Base (Make 1)
With yarn C (Leaf Green), cast on 30 stitches. Leave a tail of about 6 inches for weaving in later.
Row 1 (RS): Knit all stitches.
Row 2: Knit all stitches.
Row 3: K2, k2tog, knit until 4 stitches remain, ssk, k2. (28 stitches)
Row 4: Knit all stitches.
Row 5: Knit all stitches.
Row 6: K2, k2tog, knit until 4 stitches remain, ssk, k2. (26 stitches)
Row 7: Knit all stitches.
Row 8: Knit all stitches.
Row 9: K2, k2tog, knit until 4 stitches remain, ssk, k2. (24 stitches)
Row 10: Knit all stitches.
Row 11: Knit all stitches.
Row 12: K2, k2tog, knit until 4 stitches remain, ssk, k2. (22 stitches)
Row 13: Knit all stitches.
Row 14: Knit all stitches.
Row 15: K2, k2tog, knit until 4 stitches remain, ssk, k2. (20 stitches)
Row 16: Knit all stitches.
Row 17: Knit all stitches.
Row 18: K2, k2tog, knit until 4 stitches remain, ssk, k2. (18 stitches)
Row 19: Knit all stitches.
Row 20: Knit all stitches.
Row 21: K2, k2tog, knit until 4 stitches remain, ssk, k2. (16 stitches)
Row 22: Knit all stitches.
Row 23: Knit all stitches.
Row 24: K2, k2tog, knit until 4 stitches remain, ssk, k2. (14 stitches)
Row 25: Knit all stitches.
Row 26: Knit all stitches.
Row 27: K2, k2tog, knit until 4 stitches remain, ssk, k2. (12 stitches)
Row 28: Knit all stitches.
Row 29: Knit all stitches.
Row 30: K2, k2tog, knit until 4 stitches remain, ssk, k2. (10 stitches)
Row 31: Knit all stitches.
Row 32: Knit all stitches.
Row 33: K2, k2tog, knit until 4 stitches remain, ssk, k2. (8 stitches)
Row 34: Knit all stitches.
Row 35: Knit all stitches.
Row 36: K2, k2tog, knit until 4 stitches remain, ssk, k2. (6 stitches)
Row 37: Knit all stitches.
Row 38: Knit all stitches.
Row 39: K2, k2tog, knit until 4 stitches remain, ssk, k2. (4 stitches)
Row 40: Knit all stitches.
Row 41: Knit all stitches.
Row 42: K2tog twice. (2 stitches)
Row 43: K2tog. (1 stitch)
Cut yarn, leaving a 6-inch tail. Pull the tail through the remaining stitch to secure. Weave in the ends using your tapestry needle.
Pro Tip: The decreases on rows 3, 6, 9, etc., create a gentle oval shape. If you prefer a perfectly round base, you can adjust the decrease placement, but the pattern as written produces a lovely leaf-like silhouette that complements the flower beautifully.
Flower Motif (Make 1)
With yarn A (Petal Pink), cast on 10 stitches.
Row 1 (RS): Knit all stitches.
Row 2: Knit all stitches.
Row 3: K1, (yo, k1) repeat to end. (19 stitches)
Explanation: The yarn overs (yo) create extra stitches that will later be dropped to form long, ruffled loops.
Row 4: Knit all stitches, dropping the yo's as you go (this creates long loops).
How to drop a yo: Simply knit the stitch, but when you encounter a yarn over, let it fall off the needle without knitting it. This creates an elongated strand of yarn that will form the petal loops.
Row 5: Knit all stitches.
Row 6: Knit all stitches.
Row 7: K1, (yo, k1) repeat to end. (37 stitches)
Row 8: Knit all stitches, dropping the yo's as you go.
Row 9: Knit all stitches.
Row 10: Knit all stitches.
Bind off loosely. This creates a ruffled, petal-like strip.
Tip: When binding off, use a larger needle or bind off loosely to maintain the ruffled effect. If your bind-off is too tight, the flower won't gather properly.
Center (Make 1)
With yarn B (Buttercup Yellow), cast on 5 stitches.
Knit 6 rows in stockinette stitch (knit one row, purl one row). Bind off. This will be a small square that curls into a circle.
Note: The stockinette stitch naturally curls at the edges, which is exactly what we want for the center of the flower. Don't try to flatten it—the curl is part of the design!
Assembly
Now it's time to bring your Enchanted Meadow Mug Rug to life. Follow these steps carefully for a polished, professional finish.
Step 1: Position the Flower
Lay the green base flat with the right side facing up. Place the pink flower motif in the center. The ruffled edge should naturally form a circle—gently arrange the loops so they radiate outward like petals. Don't worry if it looks a bit messy at this stage; the sewing will secure everything.
Step 2: Sew the Flower to the Base
Using yarn A (Petal Pink) and your tapestry needle, thread a length of about 12 inches. Starting from the wrong side of the base, bring the needle up through the center of the flower. Sew through the gathered stitches at the center of the flower, catching the base fabric underneath. Work in a circular motion, stitching through the center of the flower to secure it firmly to the base. Make several passes to ensure the flower is well-attached. The loops should fan out naturally around the center.
Pro Tip: Take your time with this step. The more securely you attach the flower, the longer your mug rug will last through repeated use and washing.
Step 3: Attach the Yellow Center
Take the yellow stockinette square. It should have curled into a natural spiral. Roll it into a tight spiral, with the right side facing out. Using yarn B (Buttercup Yellow), sew the rolled spiral to the middle of the flower, covering the gathered stitches where you attached the pink petals. Stitch through the spiral and the base to secure it firmly.
Step 4: Weave in All Ends
Using your tapestry needle, weave in all loose ends on the wrong side of the mug rug. Make sure to weave in at least 2 inches of yarn to prevent unraveling. Trim any excess.
Step 5: Block Gently
To finish, block your mug rug to flatten the base and enhance the flower shape. You can do this by lightly misting the piece with water and laying it flat to dry, shaping it as needed. Alternatively, you can place a damp cloth over the mug rug and press gently with a warm iron (avoiding the flower loops, which you want to keep dimensional).
Note: Blocking is especially important if your base has any curling at the edges. The garter stitch should lie flat naturally, but a gentle block will ensure a perfect finish.
Care Instructions
To keep your Enchanted Meadow Mug Rug looking its best, hand wash in cool water with a mild detergent. Gently squeeze out excess water (do not wring), then lay flat to dry. If needed, you can iron on a low setting with a pressing cloth, but avoid flattening the flower loops.
Customization Ideas
Once you've mastered this pattern, feel free to experiment! Here are a few ideas to make it your own:
- Color Variations: Try a lavender flower with a cream center, or a coral bloom with a golden center. The possibilities are endless.
- Size Adjustments: To make a larger version, simply cast on more stitches and work additional decrease rows. For a smaller version, cast on fewer stitches.
- Add Leaves: Knit small leaf shapes and attach them around the flower for extra dimension.
- Make a Set: Create a matching set of four mug rugs for a beautiful handmade gift.
Final Thoughts
This Enchanted Meadow Mug Rug is more than just a coaster—it's a little piece of art that brings warmth and charm to your daily routine. Whether you're sipping morning coffee, enjoying afternoon tea, or giving a thoughtful handmade gift, this project is sure to delight. The combination of garter stitch texture, ruffled petals, and a sunny center creates a piece that's both functional and beautiful.
Happy knitting, and may your coffee breaks be ever enchanted!