Dune Drift Chevron Scarf Free Pattern – Knit a Desert-Inspired Zig Zag Wrap
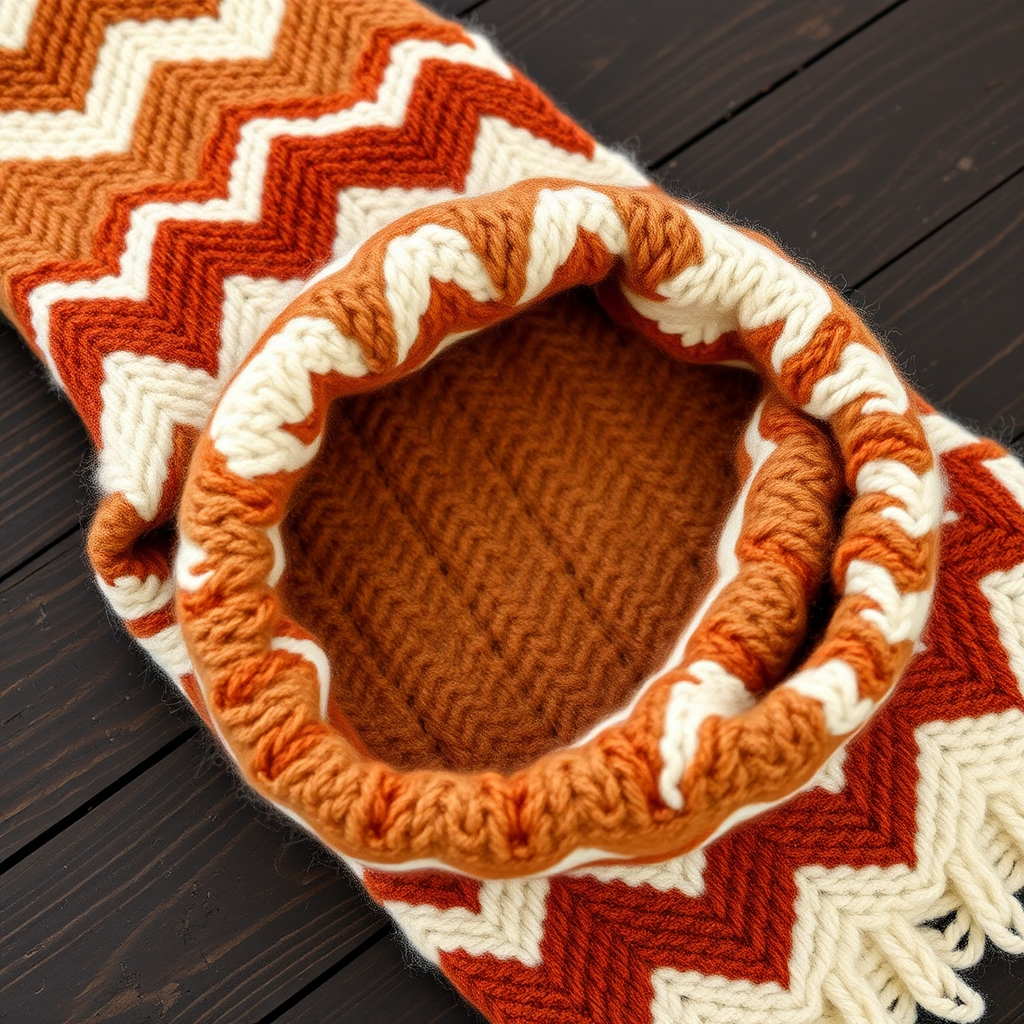
The Dune Drift Chevron Scarf: A Desert-Inspired Knitting Journey
There are some knitting projects that are more than just a way to pass the time—they become a meditative escape, a rhythmic dance of yarn and needles that produces something truly beautiful. The Dune Drift Chevron Scarf is exactly that kind of project. With its soft, sandy palette and plush, squishy texture, this scarf reimagines the classic zig zag pattern into a modern, desert-inspired accessory that drapes beautifully and feels incredible against the skin.
Whether you're a seasoned knitter looking for a relaxing project or a beginner ready to tackle your first textured pattern, this scarf is the perfect choice. The simple two-row repeat creates a stunning chevron design that looks far more complex than it actually is. The result? A cozy, handmade wrap that evokes the rolling dunes of the desert, with warm sand, rich terracotta, and creamy off-white stripes that will elevate any winter wardrobe.
In this comprehensive guide, I'll walk you through every step of creating your own Dune Drift Chevron Scarf, from gathering your materials to binding off that final stitch. Let's dive in and start knitting!
Materials Needed: Gathering Your Desert Palette
Before you begin your knitting adventure, you'll need to gather the following materials. The beauty of this project lies in its simplicity—you don't need fancy equipment, just quality yarn and the right tools.
Yarn Requirements
For this project, you'll need worsted weight yarn in three beautiful colors:
- Color A (Sand): A warm, golden beige that forms the base of your scarf
- Color B (Terracotta): A rich, earthy clay tone that adds depth and warmth
- Color C (Cream): A soft, off-white that brightens the overall design
In total, you'll need approximately 350 grams of yarn. This will give you plenty of yardage to complete the full 60-inch scarf. When selecting your yarn, look for something with good stitch definition—a smooth worsted weight yarn will showcase the chevron pattern beautifully. Merino wool, a wool-acrylic blend, or even a soft cotton blend would all work wonderfully.
Needles and Tools
- US Size 8 (5mm) knitting needles: These are the perfect size for worsted weight yarn, creating a fabric that's dense enough to be warm but loose enough to drape elegantly
- Tapestry needle: For weaving in those loose ends when you're finished
- Scissors: To cut your yarn when changing colors
- Stitch markers (optional): These can help you keep track of your pattern repeats, especially if you're new to chevron patterns
Gauge Information
For best results, aim for a gauge of 18 stitches and 24 rows = 4 inches in stockinette stitch. While gauge isn't critical for a scarf (since it doesn't need to fit a specific size), getting close to this gauge will ensure your scarf has the right drape and texture. If your gauge is significantly off, your scarf might end up too stiff or too floppy.
Pro tip: Before starting, knit a small swatch to check your gauge. This will also give you a chance to practice the chevron pattern and get comfortable with the stitch sequence!
Step-by-Step Instructions: Knitting Your Dune Drift Scarf
Now for the exciting part—actually knitting your scarf! This pattern is worked flat, back and forth, and the chevron design is created through a combination of increases and decreases. Don't worry if it seems complex at first—once you get into the rhythm, it becomes second nature.
Understanding the Pattern Notes
Before you cast on, let's review a few important notes:
- The scarf is worked flat, meaning you'll knit back and forth on straight needles
- The chevron pattern is created by strategic increases (yarn overs) and decreases (k2tog and ssk)
- Slip the first stitch of every row purlwise for a neat, polished edge. This creates a beautiful selvedge that keeps your scarf looking professional
- The pattern repeat is simple: you'll work the same row sequence over and over, just changing colors
Step 1: Casting On
With Color A (Sand), cast on 45 stitches using your preferred method. I recommend the long-tail cast-on for a stretchy, neat edge that will match the rest of your knitting. Take your time with this step—a good cast-on sets the foundation for the entire project.
Beginner tip: If you're new to casting on, practice a few times until you feel comfortable. The long-tail cast-on is a skill you'll use for every future project!
Step 2: Working Row 1 (Right Side)
This is where the magic begins! With Color A still attached, work the following pattern:
Row 1 (RS): k2, *k2tog, k2, yo, k1, yo, k2, ssk, k1; repeat from * to last 3 stitches, k3.
Let's break this down so you understand what's happening:
- k2: Knit the first 2 stitches (remember to slip the first stitch purlwise for that neat edge)
- *k2tog: Knit 2 stitches together—this is a decrease that leans to the right
- k2: Knit 2 plain stitches
- yo: Yarn over—this creates an increase and a decorative hole
- k1: Knit 1 plain stitch
- yo: Another yarn over increase
- k2: Knit 2 plain stitches
- ssk: Slip, slip, knit—this is a decrease that leans to the left
- k1: Knit 1 plain stitch
- Repeat from *: Continue this sequence across the row
- k3: Knit the final 3 stitches
When you finish this row, you should still have 45 stitches on your needle. The decreases (k2tog and ssk) are balanced by the increases (yo), so your stitch count stays consistent throughout.
Step 3: Working Row 2 (Wrong Side)
Row 2 (WS): With Color A, purl all stitches.
This is your "rest" row—simply purl across all 45 stitches. Remember to slip the first stitch purlwise for that consistent edge. This purl row creates the stockinette background that makes your chevron pattern pop.
Step 4: Introducing Color B
Now it's time to add your first color change! Here's where the desert palette really comes to life:
Row 3: Switch to Color B (Terracotta) and repeat Row 1 exactly.
Row 4: With Color B, purl all stitches.
When switching colors, simply drop the old color and pick up the new one. Don't cut the yarn yet—you'll be switching back and forth, and leaving the yarn attached will save you from weaving in extra ends later. Just let the unused yarn hang at the side of your work; it will be carried up the edge naturally.
Pro tip: When you switch colors, give the new yarn a gentle tug after the first stitch to keep the tension even. This prevents gaps or loose stitches at the color changes.
Step 5: Adding Color C
Time for the final color in your palette:
Row 5: Switch to Color C (Cream) and repeat Row 1.
Row 6: With Color C, purl all stitches.
You've now completed one full color sequence! Your scarf should have a beautiful sand stripe, followed by a terracotta stripe, and finally a cream stripe, each with the chevron zig zag pattern.
Step 6: Repeating the Pattern
Now comes the meditative part. Simply repeat Rows 1-6 until your scarf measures approximately 60 inches from the cast-on edge. This will take some time, but the rhythmic repetition is what makes this project so relaxing.
Here's your repeating sequence:
- Rows 1-2: Color A (Sand)
- Rows 3-4: Color B (Terracotta)
- Rows 5-6: Color C (Cream)
Always end with a Row 6 (a purl row in Color C) before binding off. This ensures your scarf has a symmetrical, finished look with a complete color sequence at both ends.
Beginner tip: Place a stitch marker or a piece of scrap yarn every 10 inches to help you track your progress. It's easy to lose count when you're in the knitting zone!
Step 7: Binding Off
Once your scarf reaches the desired length, it's time to bind off. Bind off loosely in pattern with Color C to maintain the stretchy, drapey quality of your scarf.
To bind off in pattern:
- Knit the first 2 stitches
- Using your left needle, lift the first stitch over the second and off the needle
- Knit 1 more stitch
- Lift the first stitch over the second and off the needle
- Continue this pattern across all stitches
When you have 1 stitch left, cut your yarn leaving a 6-inch tail, and pull it through the last loop to secure.
Important: Bind off loosely! If your bind-off is too tight, it will pull the edge of your scarf in and ruin the beautiful drape you've worked so hard to create. If you tend to bind off tightly, consider using a needle one size larger just for the bind-off row.
Step 8: Finishing Touches
Your scarf is almost complete! Now for the final details:
Weave in all ends: Using your tapestry needle, weave in the yarn tails from your cast-on, bind-off, and any color changes. Weave them through the purl bumps on the wrong side of your work, going back and forth a few times to secure them securely. Trim any excess yarn.
Block gently: This step is crucial for opening up the chevron points and giving your scarf that professional, polished look. To block your scarf:
- Fill a basin with lukewarm water and a small amount of wool wash or gentle detergent
- Submerge your scarf and let it soak for 15-20 minutes
- Gently squeeze out excess water (never wring or twist!)
- Lay the scarf flat on a clean towel and roll it up to remove more water
- Lay the scarf flat on a blocking mat or dry towel, gently shaping it to open up the chevron points
- Pin the edges if needed to help the scarf dry in the correct shape
- Let it dry completely before wearing
Your Desert Masterpiece Awaits
Congratulations! You've just created your very own Dune Drift Chevron Scarf. This beautiful, textured accessory is perfect for cozy winter days, stylish enough for a night out, and meaningful enough to be a cherished handmade gift.
The beauty of this pattern is its versatility. Once you've mastered the basic chevron repeat, you can experiment with different color combinations—think ocean blues, forest greens, or even a monochromatic palette. The possibilities are endless!
I hope this pattern brings you as much joy in the making as it will in the wearing. There's something deeply satisfying about watching those chevron points emerge row by row, and the finished result is a testament to your skill and patience.
Happy knitting, and may your days be filled with warm yarn and beautiful stitches!


